Archive for the ‘FreeBSD’ Category.

Microsoft announces it is acquiring FreeBSD for $300 Million

FreeBSD-BoxToday Microsoft® has announced that it has acquired FreeBSD®. FreeBSD is an open source operating system known for its very enterprise friendly license. Microsoft has recently embraced open source, moving .NET Core to GitHub, as well as announcing that a bash port that will run in Windows 10. However, this move was quite unexpected.

Microsoft is paying the FreeBSD Foundation approximately 300 Million for the FreeBSD brand, the open source operating system’s source repository, all forks, sub-brands (OpenBSD and NetBSD), websites, and communities.

Microsoft is in the process of negotiation full-time salaries for many of the developer volunteers.

Rumor has it that iXSystems may also be acquired either as part of this deal or as a separate deal. Interestingly enough, Microsoft is not paying for the source itself because that is already free for everyone.

In an interview with the Microsoft CEO Satya Nadella, he made the following comment:

“With Apple using so much of FreeBSD’s source in their OS X operating system, we felt owning part of the OS X operating system’s source code could really help our Office development team to write a better Office port of OS X.”

We further questioned Nadella on how this affected their recent relationship with Canonical, who ported bash to Windows 10 for Microsoft.

“Canonical is behind Ubuntu, who is moving away from the Linux Kernel. Canonical has recently embraced the idea of UbuntuBSD. With this aquisition, Cononcial and Microsoft are going work close together over the next few years.

There used to rumors that older Windows Operating Systems used some FreeBSD code, we commented to Nadella. He responded with this quip:

“Only older ones? Where do you think we get all our great ideas for our networking stack. I would expect a lot of integration between Windows and FreeBSD, especially on the networking stack.”

Is there anything that FreeBSD has that you want to pull in as soon as you can.

“Well, we are jealous that they have ZFS and Windows does not. Unfortunately, this aquisition doesn’t help bring ZFS to windows. Oracle has the copyright on ZFS. I guess we’ll have to acquire Oracle next.”

That last statement, Nadella laughed.

We were also able to contact the President of the FreeBSD foundation, Justin T. Gibbs and discuss with him the acquisition.

Has Microsoft made any exciting promises to the FreeBSD Foundation in light of this acquisition? Gibbs quipped:

“You mean besides promising to not lay us all off? No, in seriousness, Microsoft has committed to the FreeBSD copyright. They are looking for improvements in IPv6 that we have already implemented. We are looking to make .NET a first class citizen and make C# the primary development language for Web Services, Cloud Services, and Desktop apps written for FreeBSD.”

Does Mono or Xamarin have a big play in that? Gibbs responded:

“Yes, it does. In fact, expect to see FreeBSD added to the list of projects creates when you start a new Xamarin Forms project in Visual Studio. Soon, when you write an App, it will run universally on Windows devices, as well as Android, iOS, OS X, and FreeBSD.”

What does the future look like for FreeBSD under Microsoft’s reign?Microsoft announces it is acquiring FreeBSD

“The future looks promising for FreeBSD under Microsoft.”

PC-BSD 10 now available

PC-BSD 10.0-RELEASE is now available for download!

10.0-RELEASE notable features

  • Includes FreeBSD 10.0-RELEASE
  • Updated KMS / AMD driver support
  • ISO file is a hybrid USB file, and can be “dd“ed to a USB media.
  • New text-based installer
  • Able to select between GRUB/BSD loaders during installation
  • New desktops! Gnome 3, Mate (Replaces Gnome2) and Cinnamon

Read More . . .

Non-technical reasons for why Linux has a larger open source market share than FreeBSD

It is not always about who is better. Often an equal or better candidate loses for reasons that should not apply. This is true for many areas (politics for example) where what matters is overlooked by our humanity. So whether one operating system is technically better than the other is not the only factor for choosing it. Linux is the most used open source operating system and has a larger market share than FreeBSD (OS X not included). This article takes a look at some other reasons one might choose Linux over FreeBSD.

Note: This article also is not taking into account OS X, which while it has some foundations is BSD, is not open source, and this article is to discuss open source market share. Due to OS X, FreeBSD could make the claim that they have a larger market share than Linux.

Reason #1 Advertising

The bottom line to advertising is that Linux has it in quantities and FreeBSD doesn’t.

Advertising

For FreeBSD, there is very little, if any, advertising. I have never seen any ad on any media type for FreeBSD.

Linux has multiple enterprise size companies, Red Hat, SUSE (previously Novel), IBM, and others that are advertising it and using it. Linux is advertised by these companies quite heavily.

Buzz

There are a few user’s groups here and there and that is about it. FreeBSD has no little buzz marketing.

Linux has a lot of buzz. There is no questioning the buzz that was created by Ubuntu that still exists. Thanks to distros like Ubuntu, Linux has an extreme amount of buzz.

What is being done?

Over the past couple of years, iXSystems has provided an increase in advertising. Also the new BSD Magazine is another form of advertising that is beneficial.

Reason #2 – Brand name and Logo

A brand name has the ability to make or break an organization. A logo has this same ability. Why? Because they are the embodiment of the company. They provide the first impressions (don’t tell me you haven’t heard that saying about first impressions) and often the only impression.

And how it sounds is extremely important.

Think about it. Some people want to sound cool when they say the operating system they run.

  • “I run Linux!”
  • “I run FreeBSD!”
I have heard people say it many times: Linux as a word just sounds cooler than FreeBSD. Well, lets actually look at from a more scientific point of view than “just sounds cooler”.  Let look at reasons

The linguistics of a brand name

Linguistic experts have studied brand names and there are many “best practices” for a brand name, and FreeBSD follows none of them. Because of this, FreeBSD is not a good brand name. It is not even average. In fact, if you were to make a list of below average brand name, FreeBSD would reside near the bottom of the bad list, and here is why.

The goal of a looking at a brand name from a linguistics point of view is to find ways to make the brand easy to say, descriptive, and memorable . A brand name is poetry and all the linguistic elements that benefit or distract from poetry can benefit or distract from a brand name. Here are ten linguistic suggestions for having a good brand name.

  1. Use alliteration in your brand name.
  2. Use equal or more harmonious consonants than cacophonous sounds. Some consonants make sounds that are “in-between” such as F. A letter such as X has two sounds, K and S.
  3. Syllables. Two or three syllables is ideal. One doable too. Four is possible if other items in this list are good. Five syllables and above your pretty much a bad brand name.
  4. Use the correct “foot“. Use disyllables such as pyrrhic, iamb,  trochee, but avoid spondee; Use trisyllables such as anaepest, credic, dactyl but avoid molossus etc…
  5. Avoid using acronyms.
  6. Vowels should rhyme or match.
  7. Avoid contrasting vowel sounds, such as a long vowel followed immediately by a short vowel.
  8. The place of articulation of each consonant and transitions between them should be easy.
  9. Use a word that can become a noun or verb.
  10. Know definitions of roots, prefixes, and postfixes and use ones that apply to your business.

So lets compare FreeBSD brand to the Linux brand.

Winner FreeBSD Linux Explanation
1 Tie n/a n/a Neither alliterated.
2 Linux Good Bad Linux has three consonants, but one is X which has two consonant sounds K and S. Sot it has, three harmonious, one cacophanous which is a 3-1 ratio.
FreeBSD has five consonants, two cacophonous, two harmonious, one in-between, which is a 2-2-1 ratio.
3 Linux Good Bad Linux is idea having two syllables.
FreeBSD is four syllables and nothing to save it.
4 Linux Good Bad Linux is a single pyrrhic foot.
FreeBSD has two feet and they are same foot, spondee, which is the one you should avoid.
5 Linux Good Bad Linux avoided acronyms, FreeBSD, has a three-letter acronym.
6 Linux Good Average Linux is two short vowels.
FreeBSD has four vowels, three long Es and one short E.
7 Linux n/a Bad Linux has no vowels next to each other.
FreeBSD has a conflict of a long E followed by a short E between the B and S letters.
8 Linux Good Average Linux has the L and N and S sounds all made by very the same mouth parts and positions, well separated by vowels.
FreeBSD has sounds made by various different places and parts in the mouth less easy transistions.
9 Linux Average Bad Linux can be a noun, and I have heard linuxed used before.
FreeBSD is barely passable as a noun and can in no way be verabalized.
10 Tie n/a n/a Linux has no syllables with any dictionary meaning.
FreeBSD has the word “free” which is too general to provide any meaning. The acronyms detracts from the mean further.

If we rated these on a scale of 0 to 5, with bad being 0, average being 3, and Good being 5, here is how the points come out.

  • FreeBSD = 2 points. Two item were N/A, so that is 2 out of 40 possible points or 5% of the possible Good points a brand could have.
  • Linux = 35 points. Three items were N/A, so that is 33 out of 35 possible points or 94% of the possible Good points a brand could have.

As you can see, from a linguistics point of view, FreeBSD is a terrible brand name. If FreeBSD were an enterprise trying to stay alive, the first order of business would be to change the brand name. Also, this analysis proves the obvious, that most of the bad branding stems from the acronym, BSD.

Derivative brand names

Derivatives of Linux, such as Red Hat, and Ubuntu have average or above average brand name as well.  Red Hat is two simple words, though they unfortunately have no meaning for an open source operating system, but as brand name these words are simple and easy to say. Simple and easy.  Ubuntu has meaning, three syllables, matching vowels, though it isn’t exactly easy to say with 2 cacophonous to only one harmonious consonant.  Both of these

Unfortunately, the FreeBSD derivatives don’t get better. The main problem is that more than half of them feel the need to continue to use the BSD acronym in their brand. There reasoning is to show their ties to BSD, but the result is very bad brand names. For example, PC-BSD somehow took a step backward by extending to five syllables, still all accented, and adding one more cacophonous sound. There is no fixing the PC-BSD brand. The only option is a new brand. However, DragonFly BSD can easily be fixed by simply dropping the “BSD” acronym as it is not needed. Alone DragonFly is a good brand. Brands that have dropped the BSD acronym such as m0n0wall or pfSense are adequate brands, not good, not bad. OpenBSD is as bad as PC-BSD with the added negative that the word “open” actually contradicts the security goals of the platform.

As derivative brand names go, Linux derivatives or distros are far ahead of FreeBSD derivatives in brand name quality.

The art of a logo

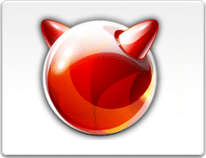
The logo is every bit as important as the brand name. Lets look at the FreeBSD logo, and the Red Hat logo and compare them.

Here are some logo tips that seemed to be common themes from dozens of sites about tips for making a good logo.

  1. Keep it simple.
  2. Make it memorable.
  3. Make sure colors coordinate.
  4. Make sure the logo has a black and white version.
  5. Color psychology. Avoid having the logo be mostly one color that may be negative.
  6. Don’t stray far from a simply decorated version of the company name.
  7. Make the logo an image that is pertinent to the brand.
  8. Avoid offensive images, even if only offensive to a small portion of the population.

One might argue that the Tux, the penguin, and Beastie, the devil or demon, are both part logo and part mascot so we will look at those, first.


Winner Linux FreeBSD Explanation
1 Tie Bad Bad Neither the penguin or Beastie are simple logos.
2 Tie Average Average Both are memorable
3 Tie Good Good Both have colors that coordinate fine.
4 Linux Good Average The penguin translates well to black and white.
Beastie is displayed as an outline.
5 Tie Average Average Tux is black, white, and yellow. Nothing great.
Beastie is red mostly.
6 Tie bad Bad Both stray from the brand name, probably
because they are more mascots than logos.
7 Tie bad Bad Neither is pertinent to the brand.
8 Linux Good Bad The penguin is nice and cute.
Beastie is a devil and controversially offensive. The reference to daemons and forks is lost on most people.

Ok, so neither mascot makes a good logo, but Tux does have a small edge over Beastie. Now lets look at the logos. I am going to use the Red Hat logo versus the FreeBSD logo, as Linux doesn’t exactly have its own logo.

Red Hat Logo FreeBSD logo

Winner Linux FreeBSD Explanation
1 Linux Average Bad Red Hat is two colors and is a complex drawing.
FreeBSD is a 3d sphere, it is more than two colors, red and black, as it has many different shades of red.
2 Tie Average Average Both are equally memorable
3 Tie Good Good Both are very well color cordinated.
4 Tie Bad Bad The color red makes both logos. Neither look as good in black and white only.
5 Tie Average Average Both have red and black. Not much difference.
6 Tie Average Average Both are an image to the left of the brand name.
7 Linux Good Bad Red Hat has a logo of a guy in a Red Hat, not pertanent to Linux but very pretinent to the brand.
FreeBSD has sphere with horns, and the relationship to a daemon is a stretch at best.
8 Linux Good Bad The Red Hat logo is a simple image, nothing offensive.
The devil horns comes with tons of religious history and is offensive to certain individuals, even toned down as a sphere with horns.

Using the same point system, 0, 3, 5 for Bad, Average, Good…

Linux gets 27 out of 40 possible points, or 67.5%.

FreeBSD gets 14 of a  40 points, or 35%.

After analyzing this, the FreeBSD logo isn’t as good overall as the Red Hat logo using the measurement above. However, I wouldn’t say the Red Hat logo is great either. I do think that just from a “looks and coolness” despite the rating system, the new BSD logo looks better.

What is being done?

FreeBSD recently updated the logo to the one you see above. There are no plans to improve the name, logo, or brand further that I know of.

Reason #3 – Licensing

Business and enterprise drive use. In my experience, business leaders equate open source software with the GPL license. I have heard so many companies say that they have banned open source software. However, every business leader I have educated in the different open sources licenses change the ban to allow BSD and similar licensed, citing that they didn’t understand the different licenses or the business and enterprise friendliness of the BSD and similar licenses.

Both the FreeBSD license and the GPL are great licenses. However, they have a slight different focus.  FreeBSD is a license designed to share code freely. GPL is also a license to share the code freely with the added enforcement that any code that uses GPL code is also GPL.

I have another post to discuss Differences between the BSD/FreeBSD Copyrights and the GNU Public License (GPL).

  • If you distribute binaries built using BSD Licensed source, there are only two things you shouldn’t do (you wouldn’t do either anyway).
  • If you distribute binaries built using GPL source, you have to pay attention. 1) your code may also be required to use the GPL license and 2) there are actions you must perform, such as provide access to the source and your source that uses the GPL source.

Businesses and enterprises often don’t understand that there are alternate licenses beyond GPL. Sometimes they actually prefer to buy commercial software just to avoid “open source”. We need to share how enterprise friendly the BSD license is with IT managers and business decisions makers.

I have seen this from personal experience. At a previous company, they mistakenly used GPL software and other software thinking it was free, forgetting that they actually have to perform actions in order to use this software. It cost them a lot of money when they were found out. The sad part is there was alternate  software available that was BSD Licensed, so they wasted money because neither the developers nor the business leader knew better. I knew better and they were quite shocked when I gave them a simple solution: Just use this alternate software as it is BSD Licensed. They did and it saved them a lot of money.

Even though I put licensing as the third reason, after thinking about it, this comes back to Reason #1 – Advertising again, because the main problem is that the GPL seems to be advertised more and many business leader are unaware of other open source licenses.

What is being done?

I think nothing is being done. I am not sure if there is any effort to advertise the benefits of the FreeBSD’s permissive licensing over other more restrictive licenses.

Reason #4 – A law suit early on

This was before my time, but I always hear that around the time Linux and BSD were released, BSD was sued and so people shied away from BSD because the threat of a law suit. This occurred well before I cared and if you want to read more about it, check out the wikipedia artcle.

http://en.wikipedia.org/wiki/USL_v._BSDi

I can’t prove that BSD was slowed by this, or that Linux wouldn’t have the same advantage in market share over BSD had this occurred. But every time I see a question about why FreeBSD is not more popular someone brings this up.

However, when Linux was sued by SCO, it didn’t really affect the market, so I am not sure if this was really valid or not. It is a historical possibility at best.

Reason #5 – Company backing

We know that in the early days of Linux there were multiple business who backed Linux. Then Red Hat and SUSE went enterprise. Ubuntu has Canonical.

For FreeBSD, Apple took it into their product but not as open source, and they didn’t really advertise the fact that they were partially BSD. iXSystems and some hosting companies are about all that FreeBSD has when it comes to an business.

What is being done?

Well, FreeBSD is continuing to get backing from Apple. I have heard rumors that Apple is one of the primary sponsors of Clang and LLVM (tools to replace gcc as a compiler) that uses a permissive license.

iXSystems kept FreeNAS a FreeBSD product by sponsoring it and has sponsored many booths at open source conferences.

I have heard of Yahoo being a strong backer of FreeBSD, though I am not sure of any recent examples.  But it is clear that FreeBSD needs more business backing if it plans to compete in the open source market with Linux.

Running Pinta on FreeBSD – A C# (Mono) Image Editor

I wanted to continue with the C# (Mono) on FreeBSD theme this week. The next C# (Mono) post for FreeBSD is simply running a .C# (Mono) app on FreeBSD. My first thought was this, “I wonder if there is a mono version of Paint.NET?”. Paint.NET is my favorite image editor for Windows. After a quick search, I found the Pintaproject, which is a Mono clone of Paint.NET.

Installing Pinta on FreeBSD

So anyway, the steps for running on FreeBSD are quite simple.  This is a preview of my next FreeBSD Friday post, as I will continue the mono them to promote you app.

  1. Follow this post to get mono on FreeBSD.
    http://rhyous.com/2010/12/10/c-mono-on-freebsd/
  2. Download the Pinta tarball.
    Note: Get the latest link from here: http://pinta-project.com/download

    $ fetch http://cloud.github.com/downloads/PintaProject/Pinta/pinta-1.3.tar.gz
  3. Extract it:
    $ tar -xzf pinta-0.5.tar.gz
  4. Change to the directory:
    $ cd pinta-0.5
  5. Run configure.
    $ ./configure
  6. Note: I am not entirely sure this is needed, but I did it because it was there.

    $ mkdir ~/.tmp
  7. Compile the solution as follows:
    $ mdtool build Pinta.sln

    Note: I am not sure why, but “make” didn’t work, though I expected it to.

  8. Then as root or with sudo, run make install.
    # make install
  9. Make the shell rehash the commands in PATH.
    $ rehash
    Or depending on your shell...
    $ hash -r
  10. Now just run pinta.
     $ pinta


Pinta is now installed and usable on FreeBSD or PC-BSD.

More information

Pinta installs the following files

/usr/local/bin/pinta
/usr/local/lib/pinta/
/usr/local/lib/pinta/Pinta.Core.dll
/usr/local/lib/pinta/Pinta.Effects.dll
/usr/local/lib/pinta/Pinta.Gui.Widgets.dll
/usr/local/lib/pinta/Pinta.Resources.dll
/usr/local/lib/pinta/Pinta.Tools.dll
/usr/local/lib/pinta/Pinta.exe

The first file, /usr/local/bin/pinta, is a shell script that runs this:

#!/bin/sh
exec /usr/local/bin/mono /usr/local/lib/pinta/Pinta.exe "$@"

The other files are the application. It is a little weird to see .exe and .dll files on FreeBSD, but I’ll get over it.

Adding Pinta to the KDE Menu

I use KDE so I was able to add a menu item for pinta easily. I used the same command that the shell script used:

/usr/local/bin/mono /usr/local/lib/pinta/Pinta.exe "$@"

I found a nice installed logo and used it for the menu icon:
/usr/local/share/icons/hicolor/96×96/apps/pinta.png

Pinta in Ports

According to this Problem Report (PR), Pinta will be a port soon, if it isn’t already. http://www.freebsd.org/cgi/query-pr.cgi?pr=164309

Building a FreeBSD kernel for debugging

You may want to actually debug the kernel or a kernel module, however, debugging is not enabled by default.

Prereqs

Before getting started it is assumed you have a FreeBSD Install and you have downloaded/installed FreeBSD Source.

The steps are identical to the steps contained in the How to build and install a custom kernel on FreeBSD? article, with the exception of the kernel configuration file.

Step 1 – Create a new kernel config

  1. Determine your architecture by running this command:
    # uname -a
    FreeBSD 9.0-RELEASE FreeBSD 9.0-RELEASE #0: Tue Jan 3 07:46:30 UTC 2012 root@farrell.cse.buffalo.edu:/usr/obj/usr/src/sys/GENERIC amd64
    
  2. Look at the last text item in the output string. I have amd64 so that is my architecture: amd64
  3. Change to the directory of the kernel configuration files for your architecture. Remember if you are on a different architecture to replace amd64 in the following command lien with your architecture.
    # cd /usr/src/sys/amd64/conf
    
  4. Copy GENERIC to a new file.
    # cp GENERIC KRNLDBG
    
  5. Edit KRNLDBG with your favorite text editor.
  6. First, change the ident value near the top from GENERIC to KRNLDBG.
    ident           KRNLDBG
    
  7. Add debugging settings to your KRNLDBG configuraiton file.
    options           KDB
    options           KDB_TRACE
    options           DDB
    options           GDB
    
  8. Save and close your new KRNLDBG configuration file.

For the remaining steps, follow the How to build and install a custom kernel on FreeBSD? article, only replace any references to KRNL1 kernel config file with the KRNLDBG config file created in the previous step.

Once you are done building and installing the kernel, you should have debugging enabled.

I happen to be working with a kernel module that is crashing and when it crashes, it automatically places me in a debugging session with the following prompt.

db>

Installing VMWare Tools on FreeBSD 9

Virtualizing a FreeBSD server is common place. Knowing how to install VMWare Tools on a FreeBSD server without X11 is going to be extremely important. This article will provide the steps.

Lets get started.

Step 1 – Install FreeBSD as VMWare Guest.

Instructions for installing FreeBSD 9 are found here: How do I install FreeBSD 9?

It shouldn’t be much of an effort to follow these steps inside a VMWare guest.

Note: You may consider taking a snapshot here to save your current state.

Step 2 – Update FreeBSD and Install ports

Instructions for updating FreeBSD and installing ports are found here:
Update FreeBSD and Install ports

Note: You may consider taking a snapshot here to save your current state.

Step 3 – Install Prerequisites

Step 3.1 – Install Perl

Installing Perl is easy. Use either of the following commands.

From ports

# cd /usr/ports/lang/perl5.12
# make install

From packages

# pgk_add -r perl

Step 3.2 – Install compat6x-amd64

The compat6x-amd64 port is also easily installed.

From ports

# cd /usr/ports/misc/compat6x/
# make install

From packages

# pkg_add -r compat6x-amd64

Step 4 – Take a VMWare Snapshot

Important! Take a snapshot here! Do not skip this step.

Step 5 – Mount the VMWare Tools ISO

I am using VMWare workstation. Some steps may be slightly different if you are using ESXi or other VMWare solution.

  1. In VMWare Workstation, choose VM | Install VMWare Tools.
  2. In FreeBSD as root, create a directory to mount the CD-Rom to.
    # mkdir /cdrom
    
  3. Mount the cd-rom.
    # mount -t cd9660 /dev/cd0 /cdrom
    

Note: You may consider taking a snapshot here to save your current state.

Step 6 – Extract the vmware-freebsd-tools.tar.gz

Now that the drive is mounted, it should be easy to get to the vwmare-tools file.

  1. Copy the vmware-freebsd-tools.tar.gz file to a local location.
    # cp /cdrom/vmware-freebsd-tools.tar.gz /root
    
  2. Extract the vmware-freebsd-tools.tar.gz file.
    # cd /root
    # tar -xzf vmware-freebsd-tools.tar.gz
    

VMWare tools should now be extracted.

Step 7 – Recompile VMWare Tools Modules

Before you install VMWare tools on FreeBSD 9, you need the modules to work with FreeBSD 9. VMWare is slow to update the vmware tools for the FreeBSD guest. So you are just going to have to update them yourself.

Note: We are now at the point where we are going to do more and install more than you want to for your nice new clean server, but that is ok, because we have a snapshot and once we get the files compiled you can revert to the clean snapshot. Alternately if you have another FreeBSD system, you can do these steps on that system.

If you install without recompiling as of May 10, 2012, you will get this result.

Starting VMware Tools services in the virtual machine:
   Switching to guest configuration:                                   done
   Guest memory manager:                                              failed
   Blocking file system:                                              failed
   Guest operating system daemon:                                      done
Unable to start services for VMware Tools

Execution aborted.

Compiling the modules first should prevent the above failures.

Step 7.1 – Get FreeBSD Source

Download the FreeBSD Source as described here.

How to download FreeBSD source using svn?

Step 7.2 – Configure the /etc/make.conf

Right now there is a move toward compiling with clang over gcc. Because of changes due to this, you need to add the following line to your /etc/make.conf to compile with gcc. I have not tried to compile with clang yet.

  1. As root open the /etc/make.conf file with you favorite editor and add the following line:
    MK_CLANG_IS_CC=no
    
  2. Save and close the /etc/make.conf file.

Your /etc/make.conf is now configured.

Note 1: You may want to compile a custom kernel while you are at this. If so, check out this article: How to build and install a custom kernel on FreeBSD? If you do this, remember that you have to copy the new kernel to your clean system too.

Step 7.3 – Compile the vmmemctl module

Recompile vmmemctl using these steps.

  1. Go to the lib/modules/source directory under where you extracted vmware-freebsd-tools.tar.gz.
    # cd /root/vmware-tools-distrib/lib/modules/source/
    
  2. Extract vmmemctl.tar
    # tar -xf vmmemctl.tar
    
  3. Change to the vmmemctl-only directory.
    # cd vmmemctl-only
    
  4. Run make.
    # make
    
  5. Run make install.
    # make install
    

You have now built and installed the vmmemctl module.

Step 7.4 – Compile the vmblock module

  1. Go to the lib/modules/source directory under where you extracted vmware-freebsd-tools.tar.gz.
    # cd /root/vmware-tools-distrib/lib/modules/source/
    
  2. Extract vmblock.tar
    # tar -xf vmblock.tar
    
  3. Change to the vmblock-only directory.
    # cd vmblock-only
    
  4. Run make.
    # make
    
  5. Run make install.
    # make install
    

You have now built and installed the vmblock module.

Step 8 – Install VMWare Tools

You are now ready to install the VMWare Tools.

Note: If you are trying to keep you server clean and pristine, then copy the /root/vmware-tools-distrib directory off the server somewhere. THen revert to the snapshot you took just before Step 4. Copy the directory back to your clean snapshot and continue.

  1. Move into the directory created by the extraction.
    # cd /root/vmware-tools-distrib/
    
  2. Run vmware-install.pl
    # ./vmware-install.pl
    
  3. Select all the defaults.

Your vmware tools installation should go smoothly.

How to build and install a custom kernel on FreeBSD?

Lets get started. The main reason I am writing this when so many articles on this already exist is because many articles do not have all the steps in one place. For example, the article in the FreeBSD Handbook doesn’t have steps for downloading the source using subversion or for making sure you have enough space on the root partition. See this article here: Building and Installing a Custom Kernell

Step 1 – Install FreeBSD as VMWare Guest.

Instructions for installing FreeBSD 9 are found here:

How do I install FreeBSD 9?

You may also want to install FreeBSD ports:

How to install FreeBSD ports

Step 2 – Download FreeBSD Source

Instructions for downloading FreeBSD Source can be found here:

How to download FreeBSD source using svn?

Step 3 – Build the GENERIC Kernel

Before you create a custom kernel it is always good to know that the default GENERIC kernel is compiling and working. Also, if you are practiced at this and are certain this will work, feel free to skip this step.

Note: I call it the GENERIC kernel because the GENERIC is the file name of the default kernel configuration.

  1. Go to the /usr/src directory:
    # cd /usr/src
    
  2. As root, run this command:
    # make buildkernel
    
  3.  Wait for the compile to complete

Step 4 – Create a new kernel config

  1. Determine your architecture by running this command:
    # uname -a
    FreeBSD 9.0-RELEASE FreeBSD 9.0-RELEASE #0: Tue Jan 3 07:46:30 UTC 2012 root@farrell.cse.buffalo.edu:/usr/obj/usr/src/sys/GENERIC amd64
    
  2. Look at the last text item in the output string. I have amd64 so that is my architecture: amd64
  3. Change to the directory of the kernel configuration files for your architecture. Remember if you are on a different architecture to replace amd64 in the following command lien with your architecture.
    # cd /usr/src/sys/amd64/conf
    
  4. Copy GENERIC to a new file.
    # cp GENERIC KRNL1
    
  5. Edit KRNL1 with your favorite text editor.
  6. First, change the ident value near the top from GENERIC to KRNL1.
    ident           KRNL1
    
  7. Make any other changes you would like to make.It is hard to know why you are building a custom kernel and hopefully you know what you need in your custom kernel. This is where you modify the kernel to provide what you need.
  8. Save and close your new KRNL1 configuration file.

Step 5 – Build the custom kernel

Now that you have a new configuration file, build a kernel using that configuration file.

  1. Compile the kernel.
    # cd /usr/src
    # make buildkernel KERNCONF=KRNL1
    
  2. Wait for you kernel to build.

Step 6 – Verify you have enough space for the new kernel

  1. Make sure you have enough free space to install your kernel.Note: Your output may be quite different than mine.
    # df -ah
    Filesystem    Size    Used   Avail Capacity  Mounted on
    /dev/da0p2     74G    4.3G     64G     6%    /
    devfs         1.0k    1.0k      0B   100%    /dev
    
  2. If your root partion, /, has a capacity greater than 55%, you probably OK. Otherwise, your backup or kernel installation may fail.

Step 7 – Install the custom kernel

  1. Install the Kernel.
    # make installkernel KERNCONF=KRNL1
    
  2. Reboot the system.
    # reboot
    

You now have a custom kernel installed.

Using FreeBSD inside a controlled network – A required HTTP Proxy and No FTP

Inside a controlled network, it is a little harder to use FreeBSD. The simple things become hard, such as running “portsnap fetch extract” or running “make install” on a port.

In a certain network, I am experiencing certain security settings that I must make FreeBSD work around:

  1. An HTTP proxy is required to access external sites
  2. No FTP access.

Working with a required HTTP proxy on FreeBSD

You cannot bypass the proxy. Most ports are blocked with HTTP/HTTPS forced through the proxy. Even worse, DNS only responds for internal addresses  and the proxy handles the external sites, so your local box never actually resolves names to IP addresses and the browser only works because the proxy makes it work.

Setting a global proxy on FreeBSD

You can configure FreeBSD to use a proxy. You can set a global proxy, sort of. It looks like you can set a global proxy per shell. However, not all apps respect that proxy.

csh/tcsh

To add a global proxy to any csh or tcsh shell, add the following line to this file: /etc/csh.cshrc

setenv HTTP_PROXY http://ProxyNameOrIp:8080

sh

To add a global proxy to any sh shell, add the following lines to this file: /etc/profile

HTTP_PROXY=http://ProxyNameOrIp:8080
export HTTP_PROXY

Now that you have made these settings, your proxy should be working and any tool that uses HTTP/HTTPS, such as fetch, portsnap, make fetch, etc., should now properly use the proxy to access the internet.

fetch and tools that use it (ports, portsnap, etc…)

Any HTTP source should now work. Both ports and portsnap and other such FreeBSD tools use fetch so as soon as the environment variable is set, fetch and any tool that uses it will work.

Tools that don’t use fetch (Subversion, etc…)

Other tools, such as subversion, may not support the HTTP_PROXY environment variable and must be manually configured. For Subversion, I couldn’t find a global setting, instead it was a user setting. The file in your home directory. It usually exists by default but contains only comments. The following is the minimal lines you need.

[global]
http-proxy-host = ProxyNameOrIP
http-proxy-port = 8080

Working with no FTP access on FreeBSD

This problem is easy to get around. Always use HTTP or HTTPS. FreeBSD has usually made it that simple as all the common tools that use FTP seem to have HTTP options as well.

Ports

Most ports have an HTTP site as a backup download location. The best case, you run make install and it just finds an HTTP site and downloads the port for you. In the worst case, you may have to manually edit the Makefile and add an http source.

Portsnap uses http by default.

Decoupling settings from /etc/rc.conf in FreeBSD

The rc.conf file can have a lot of settings that quite important. In fact, I would say it has so many settings that it often gets very bloated. Have you ever made a huge mistake and wiped out the rc.conf when it is huge and full of many settings. Or have you ever had a system crash that wiped out the rc.conf? I have! A large rc.conf can be difficult to recover without a backup. On a production server, I will have such a backup but in my lab and on my PC-BSD desktop, I don’t.

My personal experiences of erasing the rc.conf are silly but they happened. Feel free to laugh but I have been using FreeBSD since 2001 (11 years as of the writing of this post) and each of these happened in lab environments or on my personal laptop where I was less careful and none of them ever happened on a production server.

  1. I accidentally ran a command that wiped it because I used > which overwrites the file, instead of >>, which appends to the file.
    $ sudo echo ‘someapp_enable=”yes”‘ > /etc/rc.conf
  2. PC-BSD wireless settings are written to the /etc/rc.conf file and once while managing my wireless settings, the system crashed, rebooted, and my /etc/rc.conf was empty.
  3. I once was going to delete the hosts file and add a new one and I am so used to typing /etc/rc.conf that I typed that instead of /etc/hosts. Oops!
    $ rm -f /etc/rc.conf
  4. While writing a script to update a setting in /etc/rc.conf, my script wiped it. Maybe the reason was similar to #1, maybe it was different, I don’t remember.

How to store settings in separate files on FreeBSD

If you do a quick read of the man 5 rc.conf, it will tell you that you can put setting in rc.conf, rc.conf.local, or in any filename residing in a folder called /etc/rc.conf.d and all these files can store settings.

Moving all your settings to rc.conf.local just moves the problem I described above, it doesn’t actually fix it, so I am not going to use that solution. However, using a separate file per setting in the /etc/rc.conf.d directory is quite a great idea.

Step 1 – Create the /etc/rc.conf.d directory

  1. Create a /etc/rc.conf.d directory:
    # sudo mkdir /etc/rc.conf.d

Step 2 – Create a file to hold a setting

Example 1 – Hostname

  1. Create a file in /etc/rc.conf.d and name it hostname.
  2. Add the hostname=”SystemName.domain.tld” setting to the file.

Note: You can do both steps at the same time with one command:

# sudo echo ‘hostname=”SystemName.domain.tld”‘ > /etc/rc.conf.d/hostname

Example 2 – SSH

  1. Create a file in /etc/rc.conf.d and name it ssh.
  2. Add the sshd_enable=”YES” setting to the file.

Note: You can do both steps at the same time with one command:

# sudo echo ‘sshd_enable=”YES””‘ > /etc/rc.conf.d/ssh

Example 3 – Default Gateway

Yes, on FreeBSD the default route setting is called defaultrouter, not gateway or defaultroute as one would expect.

  1. Create a file in /etc/rc.conf.d and name it defaultrouter, or if you want to name it gateway or defaultroute.
  2. Add the defaultrouter=”192.168.0.1″ setting to the file.

Note: You can do both steps at the same time with one command:

# sudo echo ‘defaultrouter=”192.168.0.1″‘ > /etc/rc.conf.d/defaultroute

Conclusion

If you use the /etc/rc.conf.d file, then if you ever accidentally overwrite a file, it is not that hard to deal with because every setting is decoupled in its own file. You only lose one setting.

From now on, in my posts, I will tell likely suggest adding settings using a separate file in /etc/rc.conf.d.

How to install MySQL on FreeBSD

Note: Tested on FreeBSD 9

Step 1 – Install FreeBSD

  1. First install FreeBSD. Instructions for installing FreeBSD is contained in this article.
    How I install FreeBSD 9?
    (Legacy) How I install FreeBSD?
  2. Second update FreeBSD and install the ports tree. Instructions for this are in this article.
    What are the first commands I run after installing FreeBSD?

Step 2 – Installing MySQL

Install MySQL from Ports

  1. Change to the directory of the mysql55-server port.
    # cd /usr/ports/databases/mysql55-server
  2. Now install mysql55-server with ‘make install’.
    # make install

    MySQL 5.5 Server (and MySQL 5.5 client) will download, compile, and install automagically for you.

    Note: You may be wondering about the WITH_CHARSET option that used to exist. This is not necessary during compile and install and we will set the character set in a later step. Don’t start the MySQL service until we make these changes.

Installing MySQL from Packages

  1. Install easily as a binary package with this simple command.
    pkg_add -r mysql55-server

Step 3 – Configure MySQL

Configuration of MySQL is done in the my.cnf file.

Example 1 – Configuring mysql to use UTF8

For this example, we will change our server to use UTF8.

  1. Change to the /usr/local/etc/ directory. This is the default location for the my.cnf file.
    cd /usr/local/etc/
  2. Add the following to the my.cnf file.
    # # # > /usr/local/etc/my.cnf echo '[mysqld]' >> /usr/local/etc/my.cnf echo character-set-server=utf8 >> /usr/local/etc/my.cnf echo collation-server=utf8_general_ci

Note: FreeBSD has multiple example my.cnf files here: /usr/local/share/

  • my-huge.cnf
  • my-innodb-heavy-4G.cnf
  • my-large.cnf
  • my-medium.cnf
  • my-small.cnf

Step 4 – Configure MySQL to start on boot

  1. Add the following lines to the /etc/rc.conf file.
    #
    #
    echo # MySQL 5.5 Server >> /etc/rc.conf
    echo 'mysql_enable="YES"' >> /etc/rc.conf
  2. Now start your server.
    # /usr/local/etc/rc.d/mysql-server start

Step 5 – Secure your MySQL installation

MySQL documentation covers this and I’ll not repeat it here. Instead, go here:
2.2 Securing the Initial MySQL Accounts

Integration with Apache and PHP

If you want to integrate Apache and PHP see these articles.

How to install FreeBSD 9?

FreeBSD 9 comes with a new installer and installing it is quite fast.

Part 1 – Download the media

Step 1 – Download the DVD ISO

  1. Go to http://www.freebsd.org/where.html and click to the ISO link for FreeBSD 9 for you architecture. (x86, amd64, etc…)
  2. Click to download the FreeBSD-9.0-RELEASE-amd64-dvd1.iso.

Step 2 – Burn the ISO to a DVD

I am not going to give you steps for burning an ISO, as you could be on Windows, Linux, OS X, and you could be using any of the DVD burning tools out there.

I’ll give you this hint though…Do not burn the ISO file onto the disk as a file.

Note: Skip this step if you are installing to  a virtual machine.

Part 2 – Install FreeBSD

Step 1 – Boot off the DVD

  1. Put the DVD in your drive. (Or if using a virtual machine, point the virtual machine’s DVD drive to the ISO file.)
  2. Boot your system.
    Note: If you system doesn’t boot off the DVD check the BIOS settings or try pressing F12 to select the boot device

  3. The next screen will automatically boot but delays 9 seconds.
    Press enter to continue without waiting.


    Your now booting to the installer.

Step 2 – Install FreeBSD

  1. Click Install on the first screen.

  2. If you need a special keyboard layout, click yes, otherwise, click no. I clicked no.
  3. Enter the host name for this new installation.
  4. Select the optional system components and press enter.

  5. Partitioning can be done for you with Guided or you can do it yourself with Manual.Note: With todays hard drives, there is little to no benefit from having  multiple partitions as there was in the past. Just use Guided and the root partition will fill the drive.Note: Doesn’t look like we have ZFS options yet.

  6. Look over the guided partition settings.
  7. Click Commit to perform the installation.

    It runs the checksum verification to make sure media is valid.


    It then commits the install.

    It is actually not that long of a wait before you are pretty much done.

    The installation has committed. You will now be asked post-installation configuration questions.

Step 3 – Configure Post-installation settings

  1. Enter a password for the root account when prompted. Enter it again to verify it.
  2. Select your network card.
  3. Unless you know for sure you are going to use IPv6 only, say Yes to enabling IPv4.
  4. Unless you have been given a specific IP address to use, say Yes to enabling DHCP.
  5. Lately I like to enable IPv6 because all my operating systems now support it. But you probably don’t need it unless you know you need it.
  6. If you enabled IPv6, you probably want this option, unless you have a specific IPv6 address you need to use.

    Your dynamic network settings are determined.
  7. Your DNS setting may be detected for you, but if not, you can enter your DNS settings manually. I only entered a single DNS entry for IPv4.
  8. Unless you have a server that needs its clocked synchronized to UTC, select No when prompted.
  9. Select your time Region.
  10. Select your Country.
    Note: United States is number 49.
  11. Select your Time Zone.
  12. You may get a prompt to very whether the Time Zone you selected is correct. Select Yes if it is correct.
  13. Choose what to install.
    Note: If you are on a laptop you consider selecting powerd.
  14. If you want to contribute to FreeBSD and help them resolve bugs (especially yours) select yes. Otherwise, select No.
  15. Select Yes when prompted to Add user accounts.
  16. Enter a user name and follow the prompts.


    Note: Don’t forget to invite the user to the wheel group if they are going su to root.
  17. Enter Yes when all the settings are correct.
  18. Select Yes if you want to add more users and repeat these steps. Once you are done adding users, select No.
  19. Press Enter to Exit.
  20. I don’t have any special settings to make, so I select No here.
  21. Go ahead an press Enter to reboot.

    Important! Do not boot of the DVD again!

    Your system will now boot and create an SSH key on its own and give you a login prompt.


    FreeBSD is now installed.

Part 3 – Configure Your FreeBSD Install as Desired

What do you want to do next?

How to write a FreeBSD Kernel Module

You may be think that writing your first kernel module is going to be a long, painful, grueling task, but really it is only slightly harder than writing your first program, Hello World!, in C or C++.

Lets break this into nice easy steps.

Prerequisites

It is assumed you have installed FreeBSD already. If not, follow the instructions below with one change: Install the FreeBSD source during the “Choose Distribution” section.

How do I install FreeBSD?

Step 1 – Create a basic module file

A FreeBSD kernel module is written in C. This is going to be only a slightly harder than writing hello world in C. We are going to create a single text file with a .c extension and put some C code in it.

  1. Create a folder to hold you project. I used this directory:
    /usr/home/jared/code/kernel/hwm
  2. Create the file to hold your code. I named my file this:
    hello_world_kmod.c
  3. Edit the file with you favorite editor, vi, vim, emac, ee. I used easy editor (ee):
    ee hello_world_kmod.c
  4. Add the following code to the file.I have broken the code of the simplest kernel module into four parts or steps:
    1. Add four required #include statements.
    2. Create the kernel load/unload event handler.
    3. Create a struct to name the module and point to the event handler function.
    4. Call the DECLARE_MODULE macro.
    /*
     * Step 1 - Add the four needed libraries to include
     */
    #include <sys/param.h>
    #include <sys/module.h>
    #include <sys/kernel.h>
    #include <sys/systm.h>
    
    /*
     * Step 2 - Handle the load/unload event
     */
    static int EventHandler(struct module *inModule, int inEvent, void *inArg)
    {
            // Set return code to 0
            int returnCode = 0;
    
            switch (inEvent)
            {
              case MOD_LOAD:
                    uprintf("Hello, World! \n");
                    break;
              case MOD_UNLOAD:
                    uprintf("Bye, World! \n");
                    break;
              default:
                    returnCode = EOPNOTSUPP;
                    break;
            }
    
            return(returnCode);
    }
    
    /*
     * Step 3 - Name the module and the event hander function
     *          This is done using a struct of type moduledata_T
     */
    static moduledata_t  moduleData = {
            "hello_world_kmod",     // Module Name
            EventHandler,           // Event handler function name
            NULL                    // Extra data
    };
    
    /*
     * Step 4 - Declare the module
     *          This is done with the DECLARE_MODULE macro
     */
    DECLARE_MODULE(hello_world_kmod, moduleData, SI_SUB_DRIVERS, SI_ORDER_MIDDLE);
    
  5. Save and close the file.

Step 2 – Create a Makefile

Creating a Makefile to build a kernel module is quite easy because almost all the work is done for you. FreeBSD has a file that you include, /usr/src/share/mk/bsd.kmod.mk, that does most of the work for you and all you have to do is include it.

  1. In the same directory where you put your .c file, create a new text file called Makefile.
  2. There are three basic parts to the kernel module Makefile:
    1. Module name
    2. Source files
    3. Include of bsd.kmod.mk
    # Module Name
    KMOD = hello_world_kmod
    
    # Source files
    
    SRCS = hello_world_kmod.c
    
    # Include <bsd.kmod.mk>
    .include <bsd.kmod.mk>
    
  3. Save and close the file.

Step 3 – Run make to build the module

  1. In the command prompt, in the directory where you have created your code and make file, run make.
    > cd /usr/home/jared/code/kernel/hwm
    > make
    Warning: Object directory not changed from original /usr/home/jared/code/kernel/hwm
    @ -> /usr/src/sys
    machine -> /usr/src/sys/amd64/include
    x86 -> /usr/src/sys/x86/include
    cc -O2 -pipe -fno-strict-aliasing -Werror -D_KERNEL -DKLD_MODULE -nostdinc   -I. -I@ -I@/contrib/altq -finline-limit=8000 --param inline-unit-growth=100 --param large-function-growth=1000 -fno-common  -fno-omit-frame-pointer  -mno-sse -mcmodel=kernel -mno-red-zone -mno-mmx -msoft-float  -fno-asynchronous-unwind-tables -ffreestanding -fstack-protector -std=iso9899:1999 -fstack-protector -Wall -Wredundant-decls -Wnested-externs -Wstrict-prototypes  -Wmissing-prototypes -Wpointer-arith -Winline -Wcast-qual  -Wundef -Wno-pointer-sign -fformat-extensions  -Wmissing-include-dirs -fdiagnostics-show-option -c hello_world_kmod.c
    ld  -d -warn-common -r -d -o hello_world_kmod.ko hello_world_kmod.o
    :> export_syms
    awk -f /sys/conf/kmod_syms.awk hello_world_kmod.ko  export_syms | xargs -J% objcopy % hello_world_kmod.ko
    objcopy --strip-debug hello_world_kmod.ko
    >
    

Step 4 – Test loading an unloading the module

Loading and unloading kernel modules must be done as root. If you have sudo installed, use it, otherwise install it (Configuring sudo on FreeBSD) or su to root.

  1. Use kldload to load the module and kldunload to unload the module.
    > sudo kldload ./hello_world_kmod.ko
    Hello, World!
    > sudo kldunload ./hello_world_kmod.ko
    Bye, World!
    >
    

You have now performed the Hello World version of a FreeBSD kernel module.

Resources

How to make a Makefile?

Most software compiled on BLU (BSD/Linux/Unix) operating systems is done using make.

The simplest Makefile

The simplest Makefile compiles one single executable. Think of your simplest “Hello, World!” project.

HelloWorld.cpp

#include <iostream>
using namespace std;
int main() {
  cout << "Hello, World!";
  return(0);
}

Of course, for one file you don’t need a Makefile. You could simply run this command that will compile hw.cpp

g++ -o HelloWorld HelloWorld.cpp

So even though a Makefile seems useless for a single file, here is how you would do it.

all:
	g++ -o HelloWorld HelloWorld.cpp

Notice that you have a label and the same compile command one line below the label.

Important! The syntax requires the second line to start with a tab.

Adding objects to your Makefile

Lets assume instead of one file, you have the three file HelloWord.

  • Main.cpp
  • HelloWorld.h
  • HelloWord.cpp

Main.cpp

#include <iostream>
#include "HelloWorld.h"

using namespace std;

int main()
{
  HelloWorld hw = HelloWorld();
  cout << hw.Text << endl;
}

HelloWorld.h

#include <iostream>

using namespace std;

class HelloWorld
{
public:
  HelloWorld();
  ~HelloWorld();

  string Text;
};

HelloWorld.cpp

#include "HelloWorld.h"

HelloWorld::HelloWorld()
{
  Text = string("Hello, World!");
}

HelloWorld::~HelloWorld()
{
}

This simple project can also easily be compiled without a Makefile using this command line.

g++ -o HelloWorld Main.cpp HelloWorld.cpp

However, even with only three files you can start to see how it is much easier to type make than the lengthening command above.

Makefile

all:
	g++ -o HelloWorld Main.cpp HelloWorld.cpp

This is not perfect however, as this compiles both files every time make is run. If changes are made only to Main.cpp there is no reason to recompile HelloWorld.cpp. We can accomplish this by compiling HelloWorld.cpp to a HelloWorld.o module.

all: HelloWorld.o
	g++ -o HelloWorld Main.cpp HelloWorld.o

Similarly if you make changes to HelloWorld.h or HelloWorld.cpp, why do you need to recompile Main.cpp? So you can make it a module too.

all: Main.o HelloWorld.o
	g++ -o HelloWorld Main.o HelloWorld.o

Now only the libraries that have been modified will be recompiled when you run make. This can save significant build time when the project size increases.

Using variables in your Makefile

Mistakes are annoying.  Having to type the same thing in multiple places often leads to mistakes and typos. If you look at the above, there is duplication that is unnecessary.

Makefile with duplication

all: Main.o HelloWorld.o
	g++ -o HelloWorld Main.o HelloWorld.o

Makefile using a variable to avoid duplication

objs = Main.o HelloWorld.o
all: ${objs}
	g++ -o HelloWorld ${objs}

We can even add more variables which may not seem useful now, but are useful later.

CXX = g++
CXXFLAGS =
objs = Main.o HelloWorld.o
Outfile = HelloWorld

all: ${objs}
	${CXX} ${CXXFLAGS} -o ${Outfile} ${objs}

Think about it. Right now you only have one build command, but someday on a huge project you may have dozens and possibly hundreds. Could you imaging changing the CXXFLAGS everywhere? We don’t even have one listed yet, but of course, with the variable you only have to change it once in one place and it will work everywhere you used it.

Adding make clean to your Makefile

It is very common to want to delete all build files and build again. This is often done with the make clean command. But to get make clean to work you have to create a section or label in the make file called clean.

Because we already have variables, it is easy to configure the Makefile to support make clean.

Makefile with clean

CC = g++
CXXFLAGS = -W
objs = Main.o HelloWorld.o
Outfile = HelloWorld

all: ${objs}
	${CC} ${CXXFLAGS} -o ${Outfile} ${objs}

clean:
	rm ${objs} ${outfile}

So simple, we just use rm to delete the files we created, which are all in variables so we had a nice clean short command.

Adding debugging to your make file

There are two schools of thought for debugging.

  • All builds should be release builds unless you run make debug.
  • All builds should be debug builds unless you run make release.

I am not going to tell you which school of thought you should have.  What matters is that you can configure the Makefile to perform how you want it to.

This make file will always build without debugging (release) unless yous specify make debug.

CXX = g++
CXXFlags = -W
objs = Main.o HelloWorld.o
Outfile = HelloWorld

all: objects build

objects: ${objs}

debug: clean
CXXFLAGS += -g
LDFLAGS += -g

debug: objects build

build:
	${CXX} ${CXXFLAGS} -o ${Outfile} ${objs}

clean:
	rm -f ${objs} ${Outfile}

Notice we set LDFLAGS but we never actually call it. It is a special variable that is called automatically by the linker when creating the objects. Yes it must be capitalized.

Ghost 2.5 Beta 2 available – Ghost is a BSD distribution based on GNOME

Ghost 2.5 is a BSD desktop distribution based on FreeBSD. This version is keeping up with the latest FreeBSD 9 release. This is both a live distribution as well as an installer for FreeBSD 9.

It is exciting for a lot of BSD users who didn’t really have an out-of-the-box GNOME option on FreeBSD to have a distribution where GNOME is the focus.

The DVD ISO in 64 bit is only 1.3 GB, though there is a “lite” version that is on a single CD.

It is nice that they are using pcsysintall for their installer, though they are in early stages as the installer is a text installer and not for an Ubuntu user yet. 😉

If you are excited about this project go ahead and give them a donation. I just tossed them $5. http://ghostbsd.org/donate/

PC-BSD 9.2 Beta 2 available for testing – I just installed it

PC-BSD 9.2 Beta 2 is available for testing and I just installed it. This is probably the best desktop OS that is not Windows, Mac, or Linux.

The installer was already a nice easy GUI, so I didn’t expect many changes and it is still nice and easy to use, and just works.

The installer does present new features about PC-BSD 9.2, in that you can choose from a list of Desktop Managers. Before KDE was it during install and if you wanted something else, you could change it later, but now you have a nice list of GNOME, KDE, and others.

I chose KDE because I usually use KDE or Fluxbox and when I have plenty of system power, I go with KDE and this system is on a beefy VM.

I did miss seeing Firefox as an installable application during install? Not a big deal, as I will install it later…but I was used to it being there.

The install went flawlessly.

Setting up the Video Card still is a screen. It would be best to have it just work and not even have the screen at all. But it still prompts me and I still have to do it. I would like it to detect that I am on VMWare and just install the VMWare video driver for me or if I am on hardware, just install the driver I need.

There is a nice “tip” screen post login.

Branding is very important! AppCafe is probably one of the first times I have ever seen PC-BSD really do something that I consider a good brand. I have an opinion that the PC-BSD, which is 5 letters where you just say the letters name like an acronym, is a horrible brand and should be changed as soon as possible. However, AppCafe is great. It goes with the whole App Store idea that is trendy currently. Good move!

I quickly found Firefox and Chrome in the AppCafe. The search feature is great, otherwise they were under the “Web” group. I was curious as to why Firefox was still version 4.0.1 as Firefox is on 6.x now. The one downside is that I would really like Firefox to load a lot faster.

Flash…Yes, it works with a beta note: In previous versions, flash has worked perfectly, and it will in the next release too. However, turns out that this beta has a bug where you have to run a command to enable flash…oops. That is why we have betas. Expect this to work in the final release as Flash has worked out of the box now for multiple releases.

For KDE, After installation, App icons are placed in a desktop folder, that is a transparent box on the screen, giving the system a sense of “flashiness”.

A lot of the default Apps that were installed, such as K3B, a DVD/CD burning software, and a video player and music player are all there.

I am probably going to install a GNOME only version as well and give it a look.