Also, have you noticed this pattern – as the client or on-premise device gets more powerful, more runs on the client.
Main Frame <————–> Dumb terminal
Web Server <————–> Desktop PC (Browser becomes Terminal)
Web Server <————–> Desktop PC (Browser runs code that used to run on the server)
The Cloud <————–> Mobile device
Data Center
The pattern is this: What is on the server, eventually moves to the terminal. And the terminal gets ever smaller.
The Internal/External Wave
Now, there is also a wave where hardware started in house, moved out into Hosting services, then moved back in-house when internal data centers became easy, then moved back out when cloud was large and difficult to manage.
Once cloud is easy and smaller, that wave will move back in-house.
The future: The cloud in a box
Imagine that we have a micro server, a Rasberry PI type of device, only it has a quantum processor and is the size of a Micro SD. It has metal connectors and slides into a bus on a 1U server. The 1U server bus holds 100 x 200 of these small micro servers for a total of 20,000 servers in 1U of space. Each PI has 1 TB of space.
Now these are small and easy to host internally. A company can easily host one of them or put one in US East, US West, Europe, and Asia, and anywhere needed.
Want to get your code from before one or more changes? Find the commit id and use it.
git checkout mybranch
You can’t do much more than look around, but it can be useful, especially after a major architecture change that broke one tiny thing and you need to know why.
Pull upstream updates
git pull
Hint: Make pulling do a rebase every time by updating the config.
git config --global pull.rebase true
This has two advantages:
It makes your commit history cleaner and less entangled with merge commits.
Conflicts are resolved commit-by-commit with a rebase rather than all at once with a single merge.
Add a file
git add filename
Move a file
git mv sourcefile destinationfile
Note: You can move a directory or source file or destination file can include directories.
Delete a local branch
git branch -d mybranch
Status
git status
Revert uncommitted changes to a file
git checkout path\to\file.ext
Remove all untracked files
This makes the repository clean again.
Do a dry run first with -n.
git clean -n
Then do it for real with -f.
git clean -fxd
git diff
git diff
git merge
git merge myBranch
Take all upstream source files
git checkout --ours .
git add .
Keep all local files
git checkout --theirs .
git add .
Abort the merge
git merge --abort
git reset or undoing a local commit
Reset your local branch to head, but keep all the changes. Use this to undo a commit.
git reset HEAD^
To undo more than one commit, use a ~ followed by the number of commits to undo:
git reset HEAD~4
git rebase
This at first looks easy. But there is complexities, especially if you have already pushed.
git rebase master
If there is no merge conflict, it just works. If a merge conflict occurs, fix it. You can fix it manually, fix it in your IDE (Visual Studio, VS Code, etc.).
Once the merge conflicts have been fixed, run:
git rebase --continue
You will be prompted to commit the conflict merges.
Each commit can have a merge conflict, so if you get another one, repeat.
If you have already pushed, run this to push once rebase is complete.
git push --force-with-lease
git squash all commits
This is a multistep process. The assumption is that you are in your feature branch.
Make sure you have no lingering changes and everything is committed before starting.
Branch name in example: FeatureA
Now if you want the branch named the same, you can delete FeatureA and rename FeatureA_2 to FeatureA.
Delete local branch
git branch -d yourbranch
To force, just use a capital D.
git branch -d yourbranch
Rename local branch
git branch -m newBranchName
If you are in master and want to rename a feature branch without checking it out:
git branch -m oldBranchName newBranchName
Git conflict with Visual Studio .sln file
Often, when multiple developers are working on the same solution and adding new projects to it, git will conflict easily.
Instead of trying to merge the .sln, it is often much faster, especially if you have only added a project or two, to just take the current master’s .sln and re-add your projects to the sln.
So imagine you are working on branch FeatureA.
Note: Remember, where “ours” and “theirs” points to is opposite of where they point to on a merge.
git checkout master
git pull
git checkout FeatureA
git rebase master
git checkout --theirs /path/to/yourproj.sln
git rebase --continue
You will then have to save your commit as the commit text will open. Remember to press “Esc + Shift + :” and then type wq! and hit enter.
Now, if your branch has many check-ns, you may have to repeat the process to keep the master (theirs) .sln file.
Once your rebase is completed, make your changes to your .sln and check them in.
If you haven’t paid attention to the development world, you might have missed the current movement called “Reuseable Building Block development.” You know, as a kid, we could get blocks are build anything with them. We only had to stack them. Well, having a n-tier stack is very common, now, so stacking isn’t the issue. It is having blocks that are easy to stack. Some are calling it the open source movement, and while most reusable building blocks are open source, not all of them are. Many of the building blocks don’t have to be open source, but can simply be well-documented and work well.
With NuGet and Npm, building blocks are being created and published daily. The problem now is helping other developers recognize this movement. Changing our mindset from, “we can’t use if it wasn’t invented here,” to something more like, “this is our unique stack of building blocks for a unique problem and this stack was invented here.”
I have created a bunch of building blocks for C#. Check out my github account at https://github.com/rhyous. You will see a few reusable building blocks:
Rhyous.Collections – You know all those pesky extension methods your write for collections that are missing from the collections or from linq. I have a lot of them in here.
Rhyous.EasyCsv – A simple tool for working with csv files.
Rhyous.EasyXml – A simpel tool for working with Xml. (You might ask why I don’t have one for JSON, and that is because Newtonsoft.Json and fast.jsona already exist , so another one isn’t needed.)
Rhyous.EntityAnywhere – Wow, have a full rest api and only have to create the model class. Are you kidding, this is probably the coolest project for Web Service APIs since the REST pattern was introduced.Rhyous.SimplePluginLoader – Easily load plugins in your app.
Rhyous.SimpleArgs – Writing a tool with command line arguments? This tool allows you to configure your arguments in a model class and be done. It will output usage and force required parameters and allow for events when a parameter is set, etc.
Rhyous.StringLibrary – You know all those pesky extension methods you write for string manipulations missing from .NET Framework. They are in this library, along with a pluralization tool. Every heard of the The oft forgotten Middle Trim, well, it is in this library, too.
WPFSharp.Globalizer – The best localization library for WPF that exists, allowing you to change language and style (including left to right flow for certain languages) at runtime.
I actually have many more building blocks. Take a look.
I wrote and extension method to DateTime today. I want to call something simple to see if one date is within a two days of another date. There isn’t a within method. I set out to create one and this what I came up with.
The Tiobe index is really missing one piece of information about .Net for its users. Java is #1. So users should use Java, right? Well, maybe not. Let’s talk about the problems with it before we move on.
I am going to make an argument that:
Java is actually a more clear #1 than suggested.
.Net is #2 behind Java, but not as far behind as the Tiobe index makes it appear.
Problem 1 – DotNet Framework is not listed as one a language
.Net has more languages writing against it than just one. That makes it appear less popular because the language is more fragmented. In fact, two of them are in the top 5 or 6. However, the fact that a dll compiled in either language can be consumed by either language is really not described here. I am not saying this should be on the same list of programming languages, but Tiobe should make it clear that the combined .Net languages show .Net as being used more heavily. Similary for Java, there are other languages that compile to the JVM. Perhaps there should be a page on compile target: What percent of languages compile to .Net’s Common Intermediary Language or compile to the Java Virtual Machine or to machine code or don’t compile at all?
As for intermediary languages, there are only two that stand out: Java and .Net. And Java is #1 but it only has 1 in the top 10. .Net has two in the top 10 and the combined languages are easily a rival to the combined JVM languages.
Look at the Tiobe index and add up the .Net Framework languages:
.Net Framework Languages
Language
2019 Tiobe Rating
Visual Basic .Net
5.795%
C#
3.515%
F#
0.206%
Total
9.516%
Notice that combined, the number of the three main .Net languages is %9.516. That puts .Net in the #3 position behind Java, C, and C++.
Problem 2 – Some .Net languages are missing and may be lumped in other languages
What about Visual C++? Yes, you can write .Net code in C++. However, that language is completely missing from Tiobe. Or is it? Is all Visual C++ searches lumped in with C++? If so, shouldn’t Visual C++ be separate out from C++. What is the Tiobe raiting Visual C++ would get? That would be hard to guess. But it is a language has been around for almost two decades. Let’s assume that a certain percentage of C++ developers are actually doing Visual C++. Let’s say it is more than F# but quite a lot less than C#. Let’s just guess because unlike Tiobe, I don’t have have this data. Let’ say it was .750. Again, this is a wild guess. Perhaps Tiobe could comment on this, perhaps they couldn’t find data on it themselves.
.Net Framework Languages
Language
2019 Tiobe Rating
Visual Basic .Net
5.795%
C#
3.515%
F#
0.206%
F#
0.206%
Total
10.266%
As you see, .Net combined is clearly #3 just by combining the .Net languages. Well past Python, which in fact can be used to both code for .Net (IronPython) and for the Java JVM (Jython). What percent of python is used for that?
Here is a wikipedia list of .Net-based languages: https://en.wikipedia.org/wiki/List_of_CLI_languages.
Similarly, for Java, languages like Groovy up it’s score. Here is a wikipedia list of Jvm-based languages: https://en.wikipedia.org/wiki/List_of_JVM_languages.
Problem 3 – Visual Studio is Awesome
For all the problems and complaints of bloat, Visual Studio is the move feature rich IDE by such a long ways that I doubt any other IDE will ever catch up to it, except may Visual Studio Code, which, however, is just as much part of the Tiobe index problem as Visual Studio is.
The better the tool, the less web searching is needed. The breadth of the features in Visual Studio is staggering. The snippets, the Intellisense, the ability to browse and view and even decompile existing code means that .Net developers are not browsing the web as often as other languages. My first search always happens in Intellisense in Visual Studio, not on Google. The same features and tooling in other IDEs for other languages just isn’t there. Maybe Exclipse, but only with hundreds for plugins that most developers don’t know about.
After Visual Studio 2012 released, the need to search the web has decreased with every single release of Visual Studio. I am claiming that C#, which is the primary .Net Framework language microsoft code for in Visual Studio, is used far more than Visual Basic .Net. Tiobe has Visual Basic .Net at 5.795% and C# at 3.515%, but reality doesn’t match Tiobe’s statististics. C# is used far more than Visual Basic .Net.
I am making the hypothesis that as the primarily coded language in Visual Studio, C# would appear to go down in the Tiobe index since the release of Visual Studio 2012. Let’s test my hypothesis by looking at the Tiobe year-by-year chart for C#. Do we see the Tiobe index going down starting with the release of VS 2012?
After looking at the Tiobe index, I am upgrading my claim from a hypothesis to a theory.
Other .Net languages may not experience the same as C# as the tooling in .Net is primarily focussed around C#.
So the reality is that the Tiobe index is showing the data it can find from search engines, but the data for C# is just not there because a lot of the number of ways C# deflects the need to search.
I hypothesise that C# reached a peak Tiobe index of 8.763% and it’s usage has not actually gone down. Instead, it has gone up. However, the data doesn’t exist to prove it. Assuming the hypothesis is correct, and C# usage has gone up, then the rate it should be is closer to 9 or 10. That means the C# is probably #3 on it’s own.
If we adjust to take this problem into account, simply by using the 2012 index and not assuming the the usage rate has gone up, we see the following:
.Net Framework Languages
Language
2019 Tiobe Rating
Visual Basic .Net
5.795%
C#
8.7%
F#
0.206%
F#
0.206%
Total
17.606%
Now, I am not saying .Net is above Java with my hypothesized 17.505% adjusted rating. Java has other languages as well that compile to the JVM that would similarly raise it and it is still #1.
Problem 4 – Direct linking to or searching on Microsoft.com
Microsoft has done a great job with a lot of their documentation. Some of this could be attributed to Visual Studio as well. After clicking a link in Visual Studio, we are taking directly to a site like https://msdn.microsft.com where I do a lot of my language searches.
Also, Microsoft has built a community where customers can ask questions and get data.
Tiobe has a nice document that clearly states which search enginers did not qualify and what the reason they didn’t qualify was.
I would argue that a significant amount of searches for .Net languages are done primarily on Microsoft.com. I can only provide personal data. I often go directly to the source documentation on Microsoft.com and search on Microsoft’s site. And once I am there almost all further searches for .Net data occur there.
Microsoft has more C# developers in their company that many programming languages have world wide. Are they doing web searches through the list of qualified search engines?
Problem 5 – Better documentation
I hypothesize that the better the documentation, the less searching on the web is required. I also hypothesize that Microsoft is one of the best at providing documentation for it’s languages.
Because the documentation for .Net framework is so excellent, the question is usually answered in a single search instead of multiple searches that languages that are less well documented may require.
Problem 6 – Education
Colleges are teaching certain languages. Python and C++ are top languages taught in college. I would estimate that because of these, the languages primarily taught in college have far higher good search rates. Unfortunately, .Net languages, because of their former proprietary nature (which is no longer the case with the open source of .Net Core), were shunned by colleges.
It would be interesting to filter out searches by college students. Unfortunately, how would Tiobe know that a search came from a college student or not.
Problem 7 – Limited Verbage
Tiobe is only looking at certain words. The words that are being queried are:
C#: C#, C-Sharp, C Sharp, CSharp, CSharp.NET, C#.NET
Further, Tiobe says:
The ratings are calculated by counting hits of the most popular search engines. The search query that is used is
+"<language> programming"
This problem piggy backs on Problems 3, 4, and 5. Visual Studio is so awesome, that we know exactly what we are looking for. As a C# developer, I don’t type C# into my searches hardly at all. I type something like: WebApi, WCF, WPF, System.Net.Http or Entity Framework or LINQ, Xamarin, and many other seaches. Microsoft documentation is so clear and specific (Problem 5) that we can do highly specific searches without including the word C#.
Yes, other languages have libraries, too, but do other languages have Microsoft’s marketing department that brands libraries with trademarks and logos and makes that brand the goto phrase to search? I don’t think there is a single other programming language other than C# that does this. Microsoft is lowing the web searches for C# by their awesome marketing.
This is further evidence to explain why the actual usage of C# has gone way up while the Tiobe index has gone way down. Asp.Net, Ado.Net, Razor, WCF, WebApi, WPF, WF, etc. What other language has logos and brands around specific parts of a language?
Problem 8 – Is C# always seen as C# in search engines
I don’t always add C# to my google searches. However, when I do, it is somehow changed to just C. The sharp symbol, #, is often removed. This recently stopped happening on Google, but it used to happen with every search in every browser. It was frustrating.
Has this been addressed in search engine stats?
Conclusion
The belief that C# is in the 3% range is an unfortunate error of circumstances. And .Net should be looked at is the second most important tool for a programmer, second only to Java, and above all other programming languages.
It is well-known that a SQL guru can truncate all tables. This is not something anyone is going to do in production. For while coding or testing, this might be a common practice.
To truncate all tables, use the following sql:
EXEC sp_MSforeachtable 'TRUNCATE TABLE ?'
However, what if you wanted to exclude one table. For example, if using Entity Framework, one might want to keep the __MigrationHistory table untouched.
EXEC sp_MSForEachTable 'if ("?" NOT IN ''[dbo].[__MigrationHistory]'')
	TRUNCATE TABLE ?'
I finally figured it out by learning how to query the values:
EXEC sp_MSforeachtable 'if ("?" NOT IN ("[dbo].[__MigrationHistory]"))
         SELECT "?"'
It took me a good hour to figure this out. The key was to quote the ? variable.
public virtual OdataObject Get(string id)
{
    // code here
}
That is fine for a GET call as it doesn’t have a body. But what about a POST, Patch, or PUT call that does have a body? And what about now that the world is realizing that a GET sometimes needs a body?
Also, the examples provided a lot of code to figure out if it is a GET call and not even use the custom Json.Net IDispatchMessageFormatter. None of that code is necessary with this solution.
Let’s look at a PUT call that updates a single property of an entity as this has two parameters in the UriTemplate as well as a message body.
[OperationContract]
[WebInvoke(Method = "PUT", UriTemplate = "Users({{id}})/{{Property}} ResponseFormat = WebMessageFormat.Json)]
string UpdateProperty(string id, string property, string value);

public virtual OdataObject Put(string id, string property, string value)
{
// code here to update user
}
So there are two parameters in the UriTemplate, id and property, and the last parameter, value, is in the message body. Not a single solution for replacing the WCF serializer with Json.Net supports this scenario. Until now.
The goal is to deserialize the request with Json.Net. But the solutions provided break UriTemplate parameters in trying to reach the goal. The goal is not to replace the default WCF UriTemplate parameter work.
So now we can define a new problem: How do we deserialize the body with Json.Net but still have the UriTemplate parameters handled by WCF? The code to deserialize is the same code for both the parameters and the message body. We need to get the parameters without having WCF use the default deserializer for the message body.
If you notice in line 50, WCF has the number of parameters from the Url and Url parameters and it subtracts that from the total list of parameters. If the message has not body, the subtraction result is always 0. If the message has a body, the subtraction always results in 1, telling WCF to deserialize the body. Well, I want WCF to do what it normally does with UriTempalte parameters, so if there is no body, use the WCF default stuff (which all the blogs say to do, but they do it the hard way).
Solution:
In the custom EndPointBehavior, on the override, store the default IDispatchMessageFormater and pass it into the CustomDispatchMessageFormatter.
protected override IDispatchMessageFormatter GetReplyDispatchFormatter(OperationDescription operationDescription, ServiceEndpoint endpoint)
{
    var parentFormatter = base.GetReplyDispatchFormatter(operationDescription, endpoint);
    return new CustomDispatchMessageFormatter(this, operationDescription, parentFormatter);
}
If there is no body, use the WCF default DeserializeRequest method. This vastly simplifies the code on the blogs out there. The other examples had masses of code upstream that just wasn’t needed when message.IsEmpty could be used.
If there is a body but no parameters, just use Json.Net.
If there is a body and there are UriTemplate parameters, create a temparary parameter array 1 size smaller and pass that into the default serializer.
Copy the temp array to the orignal array.
Then just deserialize with Json.Net.
public void DeserializeRequest(Message message, object[] parameters)
{
     if (message.IsEmpty || parameters.Length == 0)
         ParentFormatter.DeserializeRequest(message, parameters);
     else
         DeserializeMessageWithBody(message, parameters);
}

private void DeserializeMessageWithBody(Message message, object[] parameters)
{
     if (parameters.Length > 1)
     {
         object[] tmpParams = new object[parameters.Length - 1];
         ParentFormatter.DeserializeRequest(message, tmpParams);
         tmpParams.CopyTo(parameters, 0);
     }
     if (message.GetWebContentFormat() != WebContentFormat.Raw)
         throw new InvalidOperationException("Incoming messages must have a body format of Raw.");
     byte[] rawBody = message.GetRawBody();
         var type = OperationDescription.Messages[0].Body.Parts.Last().Type;
         parameters[parameters.Length - 1] = RawBodyDeserializer.Deserialize(rawBody, type);
}
The deserializer becomes vastly simplified now that it isn’t trying to also handling wrapped parameters.
public class RawBodyDeserializer : IRawBodyDeserializer
{
    public object Deserialize(byte[] rawBody, Type type)
    {
        using (MemoryStream ms = new MemoryStream(rawBody))
        using (StreamReader sr = new StreamReader(ms))
        {
            JsonSerializer serializer = new JsonSerializer();
            return serializer.Deserialize(sr, type);
        }
    }
}
You may encounter the need to debug into a dependency that is NuGet package. If this NuGet package is proprietary, you need to contact the vendor. However, if the NuGet package is open source, perhaps on GitHub, then you have all the tools you need to debug into it. Debugging into an open source NuGet package is what this article is about.
We are going to use Rhyous.StringLibrary for this example. It is a simple open source project that provides some common extensions to strings. These are extensions that are often found duplicated in many different projects and sometimes multiple times in the same project.
Step 1 – Check out the Source
Check out the repo from GitHub. You need a Git client. If you don’t have one, you can use GitHub Desktop or the one that is included in the Windows install of Git.
Check out the repository: git fetch https://github.com/rhyous/StringLibrary.git
Step 2 – Compare Assembly Versions
Some NuGet packages have different assembly versions than the code. I know, they shouldn’t be it happens. Make sure that the assembly version of the dll reference via the nuget package is the same as the assembly version in the downloaded source.
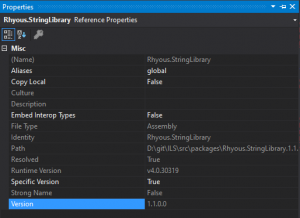
In your project that references the NuGet package, expand the references, highlight the dll that came from the NuGet package, and note the assembly version.
In the download NuGet package source project, check the Assembly version. This is different in .NET Framework and .Net Standard, but it should be easy to figure out in both.
Step 3 – Build the Solution
Open the StringLibrary.sln in Visual Studio.
Click Build.
Go to the output directory and copy the dll and pdb files.
Step 4 – Copy the dll and pdb to your solution
If you go to your project that references the dll, find and highlight the reference and go to properties, you can see the full path to the referenced dll.
Go to the solution folder of the project you are working on.
Go to your project that references the dll.
Under References, locate the dll.
Go to Properties of the dll reference by pressing F4.
Note the path to the dll.
Go into the Packages directory.
Find the folder for Rhyous.StringLibrary.
Locate the dll folder.
Rename the existing rhyous.stringlibrary.dll to rhyous.stringlibrary.dll.orgininal.
Copy the compiled dll and pdb from Step 2 to this folder.
Clean and build your solution.
Step 5 – Add a breakpoint
You should now be able to step into the Rhyous.StringLibrary source from your project.
Note: If you have two instances of Visual Studio open, one for your project and one for Rhyous.StringLibrary project, you may think you put the break point in on the one with the SimplePluginLoader project. You don’t. You don’t even need the Rhyous.StringLibrary project open, unless you need to make a change and recompile and recopy the dll and pdb to the packages directory. You simply need to step into the code in order to set a break point.
Note: One trick is to go to Tools | Options | Debugging | General and turn off Step over Property operators (Managed Only).
Debug your poject.
Put a break point on the call to Rhyous.StringLibrary you would like to step into.
Step into the call to Rhyous.StringLibrary. Once you have stepped into the call, you should see it’s source. Continue stepping into or over or whatever you would like. Once you are in the source, you can add breakpoints.
Note: If you know how to add a break point without first stepping into the project, let me know.
You should now be easily debugging your NuGet package.
I keep failing to a avoid a common mistake as a leader. Sending long emails. It seems so easy. For whatever reason, as the dev lead, I cannot talk to a person face-to-face so I write a long email.
I could spend time talking about why email is bad, or I could show you how emails make people feel by showing you an email dialogue.
Why long emails should be avoided:
Dev Lead: I’m being a good mentor. Write a nice long email that will help the team grow on a subject A, that includes tons of info on Subject A, including its 5 benefits. I send this email to Dev1 and CC the other two members of my team. Feels good about his leadership.
Dev 1: What the dev thinks: Uh, oh. The dev lead is having a hissy fit again. Looks like he is pissed at something I did. What a jerk. Feels angry.
Dev 2: Oh no. I have no idea what the dev lead is talking about. Do I know my stuff? Googles and tries to learn what the dev lead is talking about. Feels shamed.
Dev 3: Ugh! Why is he trying to teach me crap I already know. Feels patronized.
Manager: Hey, the team didn’t appreciate that email.
Dev Lead: Feels like a poor leader.
Manager: Feels like he is losing his team.
Why it would have happened better face-to-face:
Dev Lead: Hey devs. I want to discuss subject A. What do you know about it already?
Dev 1: I’ve used it before
Dev 2: Stays silent.
Dev 3: I know all about Subject A.
Dev Lead: OK, Dev 3, tell us about subject A.
Dev 3: Gives four excellent points about subject A. One of them the dev lead didn’t know.
Dev Lead: Adds two points about subject A that Dev 3 didn’t know. Changes his list from 5 to 6 adding the one item Dev 3 did knew. Feels impressed by Dev 3.
Dev 1:Feels growth.
Dev 2:Feels good to be introduced to a new subject.
Dev 3:Impressed that the dev lead let him educate the team. Feels more respect for dev lead. Also notes that the Dev Lead knew things he didn’t and thinks he should listen more.
Manager: Feels good about the team.
It is all about the feelings, and there is something about face-to-face team interaction that leads to good feelings and something about long emails that always leads to bad feelings.
So, if you look at the face-to-face interaction, you can see that it all started with a short question. You could simulate this in a short email:
Dev Lead: Who can give me all the benefits of Subject A using only the knowledge in your head. No browser search allowed until after you respond.
Dev 1: Responds with the single most common benefit if subject A.
Dev 2: Doesn’t respond.
Dev 3: Responds with four items, one that the dev lead didn’t now about.
Dev Lead: Interesting. Here are the items that the team responded with. I added two more benefits for a total of 6. Should we use subject A to get those 6 benefits in our project?
Now imaging the response was crickets.
Dev Lead: Who can give me all the benefits of Subject A.
Dev 1: Doesn’t respond.
Dev 2: Doesn’t respond.
Dev 3: Responds with one item.
Dev Lead: Subject A is interesting and important to our project. I am going to create a quick training on it.
Dev Lead: Writes a doc on it and sends it to the team.
Team: Feels good to learn something new.
Manager: Feels like the team is running itself.
Tips
Keep emails short.
Use many short emails.
Ask questions, preferable one-liners:
Start by asking your team what they already know first.
Ask follow-up questions second
Compile responses into a bulleted list
Add to the list if you can
Ask questions about the list
Thank the team
I am going to put these tips into practice next time I feel like sending a long email.
What % of code reviews should pass the first time?
About 10% should pass the first time. The other 90% of the time, a code review should fail. Now this low 10% percentage of first-time successful code reviews might increase as a team matures and members follows these rules as a behavior, but if you start to see really high first-time successful reviews, you might need to re-focus on this article.
However, if 100% or even 80% of code reviews are passing without comments, then you are likely not code reviewing thoroughly enough.
This rule is what I call the S.O.L.I.D. training wheels. For more on S.O.L.I.D., see below. Code often follows all other rules naturally if it follows the 10/100 Principle.
Method has less than 10 lines
Is the method that was added or changed 10 lines or less? (There are always exceptions such as Algorithms)
100
Is the class 100 lines or less?
Note: Model classes should have zero functions and be closer to 20 lines.
Existing code that breaks the 10/100 Rule
Did the class get smaller? We don’t make it bigger.
Does each class have a single responsibility? Does each method have a single responsibility?
Is this the only class that has this responsibility? (No duplicate code or D.R.Y. (Don’t Repeat Yourself)
Open/Closed Principle
Can you extend the functionality without modifying this code? Config, Plugins, event registration, etc.
Is there configuration in this code? If so, extract it. Configuration does not belong in code.
Encapsulation. Is everything private or internal except the few things that should be published as public?
Liskov substitution principle
Is inheritance used? If so, does the child type cause issues the parent type wouldn’t cause?
Are you using interfaces more than base classes. It is recommended to avoid inheritance over interface implementation.
Interface segregation principle
Does the code use interface-based design?
Are the interfaces small?
Are all parts of the interface implemented without throwing a NotImplementedException?
Dependency inversion principle
Does the code reference only interfaces and abstractions?
Note: If new code references concrete classes with complex methods, it is coded wrong.
Cyclomatic Complexity
Cyclomatic Complexity is the number of linearly-independent paths through a program module. Basically, if statements, conditions, etc. Higher is bad.
Are there too many conditions or branches in a piece of code? If so, that can make it buggy. Usually you never have high Cyclomatic Complexity if you follow the 10/100 Principle.
Is the code Unit Tested
Is there a matching test class for each changed code class?
If you have three code files changes, you have three three unit test files.
In C#, if you have 3 *.cs files changed, you should have 3 *.Tests.cs files.
99% coverage
Is the Code 99% covered? Is code not covered marked with the ExcludeFromCodeCoverageAttribute?
Test Names
Are tests using proper names: <ClassName>_<MethodName>_<State>_<Result>
AAA Pattern
Tests should be written with Arrange, Act and Assert parts clearly marked, often with comments.
Example in C#: Imagine a class called MyClass with a method: string DoSomething(string s);
public void MyClass_DoSomething_ParameterSNull_Throws()
{
   // Arrange
   var myClass = new MyClass();
   var expected = "SomeExpectedValue";
   // Act
   var actual = myClass.DoSomething();
   // Assert
   Assert.AreEqual(expected, actual);
}
Naming things
Typos
Are your names typo free?
Naming convention
Do your file names, class names, method names, variable names match existing naming conventions?
Specific Names
Are the names specific. Avoid general words “SomethingManager” or “AbcHelper”. General names should be avoided. Specific names are self-documenting.
Big O
Do you have any glaringly obvious Big O problems? n or n2 vs when it could be constant or log n.
See: https://en.wikipedia.org/wiki/Big_O_notation
String Handling
Are you handling strings safely?
Are there magic strings? Do you understand the difference between volatile (untrusted strings) and nonvolatile (trusted strings).
Documentation
Did you write documentation? Is every public method/property/field documented?
Is the documentation written in a way it can be used by IntelliSense and other document processors?
The C# change pattern
Often, changes that use SOLID code end up having a pattern. This pattern shows up in every pull request/code review. This pattern almost always includes the following:
A new interface: IDoSomething.cs
Unless you are implementing an existing interface.
A new class: DoSomethingImplementation.cs
If you are changing an existing class, you are usually breaking the O in SOLID.
Note: However, code that isn’t SOLID may need to change to become SOLID.
A unit test for the class: DoSomethingImplementationTests.cs
Unit Tests should be a must.
A change to the DI registration area to register the new class/interface pair.
SomeDependencyInjectionModule.cs
A unit test to test that the registration works.
SomeDependencyInjectionModuleTests.cs
The code that uses—has IDoSomething injected.
Self-review
Has the submitter reviewed their own code. I understand that some tools don’t allow you to submit a review for your own change. That is not what I am talking about. I am talking about you have reviewed your own code, added comments anticipated questions from reviewers, and made sure the code meets the code review check-list yourself.
You should be failing your own reviews once or twice before anyone else even has a chance to look at them. If the tool doesn’t support a self-review, then leave a comment, saying: I have reviewed this myself and it is ready for others to review.
Precise fractional or integral type that can represent decimal numbers with 29 significant digits
128
±1.0 × 10e−28 to ±7.9 × 10e28
byte
Zero, 0, which is also byte.MinValue.
A positive byte between 0 and 255.
byte.MaxValue or 255
sbyte
Zero, 0, which is also sbyte.MinValue.
A positive sbyte between 0 and 127.
A negative sbyte between -128 and 0.
sbyte.MaxValue or 127
sbyte.MinValue or -128
int
A positive int between 0 and 2,147,483,647
A negative int between -2,147,483,648 and 0
Zero, 0
int.MaxValue or 2,147,483,647
int.MinValue or -2,147,483,648
uint
Zero, 0, which is also uint .MinValue.
A positive uint between 0 and 4,294,967,295.
uint .MaxValue or 4,294,967,295
short
A positive short between 0 and 32,767
A negative short between -32,768 and 0
Zero, 0
short.MaxValue or 32,767
short.MinValue or -32,768
ushort
Zero, 0, which is also ushort .MinValue.
A positive ushort, such as 1 through 65,535.
ushort.MaxValue or 65,535
long
A positive long between 0 and 9,223,372,036,854,775,807
A negative long between -9,223,372,036,854,775,808 and 0
Zero, 0
long.MaxValue or 9,223,372,036,854,775,807
long.MinValue or -9,223,372,036,854,775,808
ulong
Zero, 0, which is also ulong.MinValue.
A positive ulong between 0 and 18,446,744,073,709,551,615.
ulong.MaxValue or 18,446,744,073,709,551,615
float
A positive float between 0 and 3.402823E+38
Note: This includes the float.Epsilon, but you could test double.Epsilon separately
A negative float between -3.402823E+38 and 0
Zero, 0.0
float.MaxValue or 3.402823E+38
float.MinValue or -3.402823E+38
float.NaN
float.PositiveInfinity
float.NegativeInfinity
double
A positive double between 0 and 1.79769313486232E+308
Note: This includes the double.Epsilon, but you could test double.Epsilon separately
A negative double between -1.79769313486232E+308 and 0
Zero, 0.0
double.MaxValue or 1.79769313486232E+308
double.MinValue or -1.79769313486232E+308
double.NaN
double.PositiveInfinity
double.NegativeInfinity
decimal
A positive double between 0 and 79,228,162,514,264,337,593,543,950,335
A negative double between -79,228,162,514,264,337,593,543,950,335 and 0
Zero, 0
double.MaxValue or 79,228,162,514,264,337,593,543,950,335
double.MinValue or -79,228,162,514,264,337,593,543,950,335
string
A null string
An empty string, String.Empty, or “”
One or more spaces ” “
One or more tabs ” “
A new line or Environment.NewLine
A valid string.
An invalid or junk string
A string with many special characters: `~!@#$%^&*()_-+=,.<>/\?[]{}|
Unicode characters such as Chinese
An long string, over 256 characters, or even 1 million characters.
(Occasionally) Case sensitivity. For example, for string comparisons, case sensitivity of a string is a required Parameter Value Coverage test.
Struct
This one takes thought. You need to define this per struct you create. For example, if your struct is a point with int values X and Y, then it is simply the int list above twice, once for X and once for Y.
Enum
Any of the enums.
You may need to do each of the enums, depending on how your enum is used.
Class or Reference Types
Class Object
Objects that are defined with the class keyword need the following tested:
Null (This might go away or become optional in .NET 4.8)
Instantiated
Class properties can be primitive or value types, reference types, etc., and may need to be tested according to the type of the property.
Array, List, Dictionary, and other collections
Array, List, Collection
Null
Empty (instantiated with no items)
Not empty but values of array are tested according to the value type. For example, an int[] would need to have the values tested in the ways listed above for int.
Pay attention to how the code you are testing uses teh items in an array or list. If the items are objects, do you need to check if the list has a null item in the list?
Dictionary
Null
Empty (instantiated with no items)
Key exists
Key doesn’t exist
Value at key is tested according to its value type. For example, a Dictionary<string, int> would need to have the values tested in the ways listed above for int.
Notice: We are calling RemoveFirstLine() and RemoveLastLine(); This is because key files have a header and footer that must be removed before sending up to AWS. We’ll do this in the next section.
Step 3 – Add methods RemoveFirstLine and RemoveLastLine
By the time this publishes, you should only need to install Rhyous.String.Library. Otherwise, add this class file:
namespace Rhyous.AmazonEc2InstanceManager
{
    public static class StringExtensions
    {
        public static string RemoveFirstLine(this string text, char newLineChar = '\n')
        {
            if (string.IsNullOrEmpty(text))
                return text;
            var i = text.IndexOf(newLineChar);
            return i > 0 ? text.Substring(i + 1) : "";
        }

        public static string RemoveLastLine(this string text, char newLineChar = '\n')
        {
            var i = text.LastIndexOf(newLineChar);
            return (i > 0) ? text.Substring(0, i) : "";
        }
    }
}
Step 4 – Configure command line Arguments.
We already have an Actions arguments to edit.
Add DeleteKeyPair as a valid action to the Action argument.
Add an additional argument for the key file.
                . . .
                new Argument
                {
                    Name = "Action",
                    ShortName = "a",
                    Description = "The action to run.",
                    Example = "{name}=default",
                    DefaultValue = "Default",
                    AllowedValues = new ObservableCollection<string>
                    {
                        "CreateKeyPair",
                        "DeleteKeyPair",
                        "ImportKeyPair"
                    },
                    IsRequired = true,
                    Action = (value) =>
                    {
                        Console.WriteLine(value);
                    }
                },
                . . .
                new Argument
                {
                    Name = "KeyFile",
                    ShortName = "pem",
                    Description = "The full path to a public key already created on your file system in PEM format. The full Private key won't work.",
                    Example = "{name}=c:\\My\\Path\\mykeyfile.pem",
                    CustomValidation = (value) => File.Exists(value),
                    Action = (value) =>
                    {
                        Console.WriteLine(value);
                    }
                }
You can now upload a public key file for use on the Amazon Cloud.
I recently started interviewing for some contract positions, one a Software Developer in Test position and one a Senior Software Developer position. I am deeply surprised by the candidates complete lack of having an online presence. As I thought more about this, I realized that we have reached a point of maturity in the Software Developer roles that portfolios are now expected. I expected every candidate to have an active account on some open source source control repository, i.e. GitHub, and have a portfolio of code there.
Portfolio
When it is time to interview for a position as a developer, you should have a portfolio. The days of coding on a whiteboard should be over. Instead, an interviewer should be able to easily see your code and what you have or haven’t done.
There shouldn’t be a question about whether you can write code. Instead, the question should be: Based on the code we can see this individual has written, can they be a good fit for our team?
Proprietary code
Your portfolio cannot include proprietary code. End of discussion. If you are a developer and you can’t find code that isn’t proprietary to put into your portfolio, then what are you doing?
Open Source/Non-proprietary code
Even when working with proprietary code, there are many pieces of code that are so ubiquitous that they probably should be part of the .NET framework. You may use this code in every project you work on. Such as common string extensions in C#, or a more complete string check in javascript that checks if a string is undefined, null, empty, or whitespace.
Even better is if your code is not just stored, but it is available to be used, such as with NuGet, npm, Maven, or other code or library packaging tool. This shows that you not only have a portfolio, but you aren’t going to waste your hours rewriting code you have already written.
Where to keep your portfolio
I used to have mine on SourceForge but have since switched to GitHub. Visual Studio online is another option. Where you store your portfolio of your work does not matter as much as the fact that you do store it.
GitHub is where I chose. But you can easily Google for GitHub competitors if you want it to be elsewhere.
Brand your portfolio
My internet handle is Rhyous. Every piece of code I write that is part of my portfolio (Non-proprietary or not for someone else’s open source project) is now branded with Rhyous. Some of my older code may not be, but my new code is. For example, all my namespaces in C# now start with Rhyous. That makes it very easy to differentiate projects I have forked vs projects that I have developed.
Also, search from Rhyous on NuGet.org to see my many NuGet pacakges.
What your portfolio must show
It must show:
You have skills as a developer.
SOLID principals.
An understanding of the importance of Unit Tests.
You refuse to waste time writing the same code twice.**
You can work on projects with other developers.
You bring more than just your skill set, you bring your ready-made building blocks.
** I find this to be so very important!
My Portfolio
My portfolio shows my skills as a developer. My code uses SOLID principals. Much of my code is Unit Tested.
I don’t like to write the same code twice. I for one, will never have to write a CSV parser in C# again as I have a good quality one: Rhyous.EasyCsv. Parsing arguments? I’ll never write an argument parser again because I have Rhyous.SimpleArgs. I will never have to write many of my string extensions again as I can easily grab them for any C# project from my Rhyous.StringLibrary NuGet package. Tired of using TryGetValue to get values from your dictionary? Try Rhyous.Collections and use the NullSafe dictionary, which still uses the TryGetValue but moves it inside the indexer so you don’t have to worry about it.
What a lack of portfolio shows
It has never clicked for you. What I mean by “It” is the idea of code reuse. The idea of object-oriented programming. The idea of standing on the shoulders of giants. The simple idea of using building blocks as a kid and make things from building blocks.
Go out and make your portfolio and fill it with building blocks so every time you build something new, you can build on foundation building blocks that are SOLID and just get better.
You are familiar with creating projects in Visual Studio.
We assume you have already gone to AWS and registered with them. If you haven’t done that already, stop and go there now. Amazon has a free tier and you can create an account here: https://aws.amazon.com/free
Some of the points that were discussed in the Amazon S3 article series will not be repeated here.
Additional Information: I sometimes cover small sub-topics in a post. Along with AWS, you will also be exposed to:
.NET Core 2.0 – If you use .NET Framework, the steps will be slightly different, but as this is a beginner level tutorial, it should be simple.
async, await, Task
Rhyous.SimpleArgs
Reflection
Note: As this is the first post of a series, there is going to be some setup. If you just want the quick and code, look at the code in Step 3.
EC2 Instance Prerequisites
Before creating an instance, there are some prerequisites. This Part 1 discusses the first of these prerequisites: creating a Key pair.
Step 1 – Create the project
Open Visual Studio.
Go to File | New Project.
Choose Console Application.
Give it any name you want.
I am going to call my project Rhyous.AmazonEc2InstanceManager.
Step 2 – Add NuGet Packages
Right-click on your project and choose Management NuGet Packages.
Search for AWSSDK.EC2.
Install the NuGet package and all the dependencies.
Search for System.Configuration.ConfigurationManager.
Install it.
Search for Rhyous.SimpleArgs.
Install it.
Step 3 – Create an InstanceManager.cs file
Create a new class file called InstanceManager.cs.
Add a method to generate the key pair.
Add a method to save the key pair to disc as a .pem file.
using Amazon.EC2;
using Amazon.EC2.Model;
using System;
using System.Collections.Generic;
using System.IO;
using System.Threading.Tasks;
namespace Rhyous.AmazonEc2InstanceManager
{
public class InstanceManager
{
public static async Task&lt;KeyPair&gt; CreateKeyPair(AmazonEC2Client ec2Client, string keyName, bool writePem = false, string keyOutputDirectory = null)
{
var keyPair = (await ec2Client.CreateKeyPairAsync(new CreateKeyPairRequest { KeyName = keyName }))?.KeyPair;
if (writePem)
await SaveKeyPairToDisc(keyName, keyOutputDirectory, keyPair);
return keyPair;
}
public static async Task SaveKeyPairToDisc(string keyName, string keyOutputDirectory, KeyPair keyPair)
{
var path = Path.Combine(keyOutputDirectory, $&quot;{keyName}.pem&quot;);
await File.WriteAllTextAsync(path, keyPair.KeyMaterial);
Console.WriteLine($&quot;They key pair was saved to: {path}&quot;);
}
}
}
Notice: To create the Key pair, we use an instance of an AmazonEC2Client with a simple CreateKeyPairRequest model.
Notice: Saving the Key pair has really nothing to do with Amazon EC2 Instance management. This is just a simple File.WriteAllTextAsync call.
Step 4 – Create/Edit the App.config
Of course, it is important to know what Amazon Web Services account we are working with, so we will store this in the app.config.
If there isn’t an app.config in your project, create one.
Right-click on your project and choose Add | New Item.
Search for Application Configuration File.
Rename it to app.config.
Add an appSetting for your AWS profile name.
Add an additional appSetting for your chosen AWS region.
We are going to be adding to this program in subsequent posts. For this reason, we are going to use Rhyous.SimpleArgs library for our command line arguments as it provides ready-made command line argument features. If you have been through the S3 series, you will already be familiar with Arguments and the convention we chose to match command line arguments to the method parameter names.
Note: You should have already installed the Rhyous.SimpleArgs NuGet package.
Create an ArgsHandler.cs file to define the arguments:
Note: If you used a .NET core project you have to create this file. If you created a .NET Framework file, this file should have been created for you and you have but to edit it.
Add an Action argument.
Note: We are going to keep the exact same convention of having an Action argument that allows us to choose which method to run and for each method and have an Argument to match each method parameter name.
Add an Argument for each dynamic parameter in the CreateKeyPair method.
string keyName
string keyOutputDirectory
Note: The AmazonEC2Client parameter is not a dynamic parameter. It is fixed and doesn’t change.
Also, make sure to call Program.OnArgsHandled() in the HandleArgs method.
using Amazon.EC2.Util;
using Rhyous.SimpleArgs;
using System;
using System.Collections.Generic;
using System.Collections.ObjectModel;
namespace Rhyous.AmazonEc2InstanceManager
{
public class ArgsHandler : ArgsHandlerBase
{
public override void InitializeArguments(IArgsManager argsManager)
{
Arguments.AddRange(new List&lt;Argument&gt;
{
new Argument
{
Name = &quot;Action&quot;,
ShortName = &quot;a&quot;,
Description = &quot;The action to run.&quot;,
Example = &quot;{name}=default&quot;,
DefaultValue = &quot;Default&quot;,
AllowedValues = new ObservableCollection&lt;string&gt;
{
&quot;CreateKeyPair&quot;
},
IsRequired = true,
Action = (value) =&gt;
{
Console.WriteLine(value);
}
},
new Argument
{
Name = &quot;KeyName&quot;,
ShortName = &quot;k&quot;,
Description = &quot;A key pair name.&quot;,
Example = &quot;{name}=MyKeyPair&quot;,
Action = (value) =&gt;
{
Console.WriteLine(value);
}
},
new Argument
{
Name = &quot;keyOutputDirectory&quot;,
ShortName = &quot;k&quot;,
Description = &quot;A key pair name.&quot;,
Example = &quot;{name}=MyKeyPair&quot;,
Action = (value) =&gt;
{
Console.WriteLine(value);
}
}
});
}
public override void HandleArgs(IReadArgs inArgsHandler)
{
base.HandleArgs(inArgsHandler);
Program.OnArgumentsHandled();
}
}
}
Step 6 – Add the MethodInfoExtension
This has nothing to do with AWS, but we built it in the S3 series, so were are going to use it for this series as well. It is a class file that uses reflection to dynamically detect the needed parameters of our action methods. I am not going to go into it any more that that in this post. I’ve modified this file to work for this project. Just add it to your project. If you want to understand it more, go through the S3 posts.
Create a MethodInfoExtensions.cs.
using Amazon;
using Amazon.EC2;
using Rhyous.SimpleArgs;
using System;
using System.Collections.Generic;
using System.Configuration;
using System.Reflection;
namespace Rhyous.AmazonEc2InstanceManager
{
public static class MethodInfoExtensions
{
public static List&lt;object&gt; DynamicallyGenerateParameters(this MethodInfo mi)
{
var parameterInfoArray = mi.GetParameters();
var parameters = new List&lt;object&gt;();
var region = RegionEndpoint.GetBySystemName(ConfigurationManager.AppSettings[&quot;AWSRegion&quot;]);
foreach (var paramInfo in parameterInfoArray)
{
if (paramInfo.ParameterType == typeof(AmazonEC2Client))
parameters.Add(Activator.CreateInstance(paramInfo.ParameterType, region));
if (paramInfo.ParameterType == typeof(string))
parameters.Add(Args.Value(paramInfo.Name));
}
return parameters;
}
}
}
Step 7 – Edit the Program.cs
Update Program.cs as follows:
using Rhyous.SimpleArgs;
using System;
namespace Rhyous.AmazonS3BucketManager
{
class Program
{
static void Main(string[] args)
{
new ArgsManager&lt;ArgsHandler&gt;().Start(args);
}
internal static void OnArgumentsHandled()
{
var bucketName = Args.Value(&quot;Bucket&quot;);
var task = BucketManager.CreateBucket(bucketName);
task.Wait();
}
}
}
Now for fun, you can delete the app.config and change them to parameters.