Archive for the ‘PC-BSD’ Category.

fdisk failure re-installing PCBSD 8

Ok, so I have an IBM T40 and I am installed PC-BSD 8.  Then for fun, I downloaded a more recent snapshot (PCBSD 8-Stable) and installed that.

However, woe is me, I ran into this FreeBSD bug: 131087. This prevents me from using my Wireless, which on a laptop is a show stopper.

So I got out the release version of the PCBSD 8 installer and tried to install again, however, now it fails.

Here is the log:

Running: find-update-parts
kern.geom.debugflags: 0 -> 16
Cleaning up ad0
Running: dd if=/dev/zero of=/dev/ad0 count=2048
2048+0 records in
2048+0 records out
1048576 bytes transferred in 0.391058 secs (2681383 bytes/sec)
Running fdisk on ad0
Running: fdisk -I /dev/ad0
fdisk: invalid fdisk partition table found
fdisk: Class not found
******* Working on device /dev/ad0 *******
ERROR: The slice ad0s1 doesn't exist! FDISK Failure
Running: umount /cdmnt-install
umount: /cdmnt-install: statfs: No such file or directory
umount: /cdmnt-install: unknown file system

So obviously something is broke with the partition table.  I am not sure if this can be duplicated but it sure is annoying.
So how do I fix this?  Well, right now I decided to use dd to wipe my drive.

dd if=/dev/zero of=/dev/ad0 bs=4096k

That took something more than an hour and then I reinstalled an all worked fine.

Anyway, I wonder if there is a bug with the installer that caused this or if this is a result of the multiple crashes that occurred due to the iwi bug that causes kernel panic.

PCBSD 8 on an IBM T40

Hello all,

I thought I would share my experiences of using PCBSD 8 on an IBM T40.  I am going to put the information in separate headings, and I am going to document who is responsible for the feature I am talking about by prefacing each line with the responsible party.  If it is a positive experience, the responsible party will be in Green.  If it is a negative experience the responsible party will be in Red.

I am probably going to reinstall and do all this over again with the “snapshot” version and look for any improvements and try to submit any bugs/suggestions to Kris and his team.

IBM T40 Hardware Specs

Intel Pentium M
ATI Radeon Mobility M7 LQ (Mobility Radeon 7500 (fdds)
Intel PRO/Wireless 2200BG
Realtek AC97 Audio
Intel 82801DB PRO/100 VE Network Connection
UltraATA/100 EIDE Controller
34 GB 5400 RPM drive

Installation of PCBSD

9:20 AM started boot process
9:25 AM Finished configuring and clicked “Install”
9:37 AM 47% finished
Sorry, I was pulled away for an hour so I don’t know how long hte install took. I did find an install log, but unfortunately it had no date stamps. I rebooted before I realized that the log file itself might have had a timestamp.

PCBSD: So I don’t know how long the install took but it felt too long. I wonder if there are some tricks that can be done to speed this up.  For example, the install could use an image. It could lay down the image, then extend the last partition to fill the drive, and then modify the key files after the image is laid down, add any packages not included in the image.

Boot options

PCBSD: Adding the “Run X in Vesa mode” as item 6 is pretty cool.
PCBSD: Adding the “Run the Display setup wizard” is nice, so you can try to use a different video card post setup.
PCBSD: Single user mode and other boot options normal to FreeBSD still exist.
PCBSD: Splash screen works (this is an x86 box)
PCBSD: The bootup takes too long, there should be some ways to speed it up.

FreeBSD: I like to have a shorter delay when booting. 10 seconds is too long for me. So I added this to /boot/loader.conf

# Boot Options
autoboot_delay=”3″

Post-install Setup

Update: So I reinstalled because I tried a PC-BSD 8-stable snapshot, but ran into a FreeBSD bug, so I returned to PCBSD 8 release.  On Reinstall, the ATI-3D-Enabled drivers worked, so I am editing this to say so.  I am not sure why they didn’t appear to work the first time.  Maybe because I had tried the Radeon settings first, I don’t know.

PCBSD: On first boot, there was a great interface for configuring Xorg.

PCBSD: This has a Radeon card, but there was no option for Radeon, just ATI or Radeonhd and neither worked really.

  • Tried Radeonhd drivers – both normal and 3D failed to launch Xorg.
  • Tried ATI drivers – both worked but I used the one that enabled 3D features.

Note: I found another solution that added 3D features I wanted. See the Xorg and KDE4 Features section.

Networking

FreeBSD: Wired networking worked using DHCP without me having to do anything.
FreeBSD: Unplugging the wired network and plugging into a different subnet does not automatically cause dhclient to run again.  So in order to get new IP settings, I had to run /etc/netstart as root.  It didn’t work the first time either, I had to run it again.
PCBSD/KDE4: I couldn’t easily find a network tool to configure WIFI. I finally found it under System Settings.
PCBSD/KDE4: Once I did find the Newtork Configuration tool, it was easy to use and I connected to my WPA2 secured wireless network using a D-Link DIR-615 router.  It worked very well and I downloaded a lot with no hiccups.

Sleep/Resume

FreeBSD/ACPI: Put machine to sleep. Worked fine.
FreeBSD/ACPI/moused:
Woke machine up. No mouse. Had to use Ctrl + Alt + F1 to get a command prompt and fix this by restarting the moused daemon.

Note: Added this line before exit 0 in the /etc/rc.resume. This doesn’t resolve the bug, but restarts the mouse so it works, which is a workaround, but workable none-the-less.

/etc/rc.d/moused/restart

PCBSD/FreeBSD: Closing the lid does not put the machine to sleep.

Note: I fixed this by added this line to the /etc/sysctl.conf

hw.acpi.lid_switch_state=S3

After making the above settings, you can run this command to change it in the current booted system so you don’t have to reboot.  But the setting in /etc/sysctl.conf is what makes this persist on reboot.

sysctl -w hw.acpi.lid_switch_state=S3

Random Usability Notes

PCBSD: Ports Console is easily confused with a regular console as Icon Text is not always looked at, I recommend a different icon and naming it Ports Jail. I created this for myself.

KDE4/PCBSD: The fonts were a little off for the four default icons vs the background…but this only seems to be an issue with dark backgrounds.
Shutdown and Reboot works as a regular user by default.
KDE4: After selecting Reboot or Shutdown, there is a hesitation before the shutdown/reboot popup, so I sometimes double click. I don’t like how the shutdown/reboot popup just disappears if a second click occurs with the mouse anywhere but on the shutdown/reboot popup.

Web Usability

Firefox/Flash/FreeBSD: YouTube – Went online and clicked on one of the first videos and it played.

Xorg & KDE4 Features

Update: Do to a reinstall, I noticed that choosing ATI 3D actually worked an enabled 3D features.  I will check on the settings below to see whey they set.
Even though I had a Radeon, only the ATI or ATI 3D drivers worked. The RadeonHd drivers did not work.  Probably because it is an old Radeon and not a new RadeonHd.

Note: I got the Radeon driver to work myself by using the xorg.conf from the ati3d settting and changing the “Device” section to use the settings below. I didn’t make these up on my own, I found them here: http://userweb.cs.utexas.edu/~walter/geek/linux-t40.html#video

Section "Device"
	Identifier	"ATI Radeon"
	Driver	"radeon"
	Option	"DynamicClocks" "on"
	Option	"AGPMode" "4"
	Option	"RenderAccel" "on"
	Option	"EnablePageFlip" "on"
	Option	"BIOSHotkeys" "on"
	BusID	"PCI:1:0:0"
EndSection

After doing this, I got much better settings as described below:

Xorg/KDE4: Konsole supports transparency when using ATI 3D.
Xorg/KDE4/3D: Moving the cursor to the top of the screen will do a cool screen where it shows your configured screen in a line from left to right (four by default though I always change to 3).
Xorg/KDE4/3D: Moving the cursor to the top right corner of the screen will do a cool screen where it shows your configured screens in a 3D object (cube or pyramid).

Ctrl + Alt + Backspace is disabled

Ctrl + Alt + F1 does display the terminal sessions and then:

Alt + F2, F3, F4, …, F8 will all take you to one of the open console terminal sessions.
Alt + F9 returns you to your Xorg seesion

KDE4/PCBSD: Alt + F1 does NOT open the start bar. Right-clicking on the Fireball and choosing Application Launcher settings shows no shortcut, so you can configure it if desired. When I install KDE4 the default is Alt + F1, not None, so I assume this is something PCBSD changed.

KDE4: After selecting Reboot or Shutdown, I don’t like how the reboot option or shutdown option just disappears if I click with the mouse on the desktop.

Software Installation

PCBSD: PBIs make installing software fairly easy.
PCBSD: There are not enough PBIs.
PCBSD: The size of PBIs are HUGE, which is by design, they include every library they need to run, but by design or not, they are huge.
PCBSD: I installed Firefox and Open Office and Pidgin post install because there are updated version to those on disk anyway.

KDE4/Firefox: Firefox prompts every single time I open it to be the default browser. Saying yes appears to do nothing. I manually went to KDE4’s System Settings and change the default application for the web browser to be /Programs/bin/firefox3.sh and this issue stopped.

PCBSD: K3b installed perfected first try.

External Media

PCBSD: K3b burnt a DVD (the latest PC-BSD snapshot) without having to perform any tweak, and for those who know how many tweaks are required when using just FreeBSD and not PC-BSD, you know why this is awesome.

Weirdnesses

Every boot when loading KDE4, the following error displays: The profile “” has been selected but it does not exist.

I plan to update this from time to time with my experiences, so this post is in no way final.

PC-BSD's Ports Console in a jail is cool, but I keep clicking when I want a normal console!

Hello all,

PC-BSD’s Ports Console in a jail is cool, but I keep clicking when I want a normal console!

So today, I got fed up and I drew a new Icon for it:

I then renamed it from Ports Console to Ports Jail.

I’ll never make this mistake again and I think I will suggest this idea on the PC-BSD forums.

Oops!

This didn’t exactly work as expected.  Sure, I never confuse the Icon on the desktop anymore, or in the KDE Menu, but now I have a different problem.  If I open the Jail first, then open the regular Konsole, the icon for the running Konsole and Jail apps in the task bar are both Jail icons. The same in reverse.  If I open Konsole, then open the Jail, the icons for the running Konsole and Jail apps in the task bar are both Konsole icons.

I can’t seem to make this work how I want.

Are you using BSD or Linux and you don't even know it?

Hello everyone,

I have had two Open Source experiences with average non-geeks that I would like to share.

Experience 1 – The in-laws are using Linux
I spent Easter at my in-laws and while I was their I of course took some time to “fix” their computers. Doing some maintenance to their computers is a regular task for me. However, they had recent purchased a new netbook and it was the only computer that they didn’t need me to work on.

“You got a new Netbook?”, I asked in surprise. Not that they consult me before every purchase but I usually hear about it. “Can I see it?” I asked.

My father-in-law, a retired seminary teacher who does real estate on the side, went and got the new little Netbook.

I booted it up and while the average person couldn’t tell it was running Linux, I immediately recognized the KDE interface despite the fact that it was tweaked to look as much like windows as possible.

I pressed “Ctrl + Alt + Backspace and sure enough Xorg restarted.

The Netbook is a pretty cool system. It is featured more like a smart phone than a computer, in that it has a tabbed window and you have a limited amount of icons on each tab, including needed items such as a browser, a documentation suite (Google Docs), etc…

My son’s grandparents are using Linux and they don’t even know it. While my curiosity told me to figure out how to enable the root account and start hacking around, I pushed aside the temptation because it was pleasure enough to know that my predictions are coming true.

I said, “By 2010, Linux will be above the watermark of requirements for the majority of users, and will start taking the market by storm.” And I am telling you it has begun.

Well, you might argue that this one purchase by my grandparents doesn’t mean this is true.

Well, I would retort that it isn’t just this one incident.

  • Netbooks are very popular and selling fairly well among all walks of life, not just to my grandparents.
  • There are many Google phones that are running Android, based on the Linux kernel.
  • Slashdot has a story where Ubuntu is claiming 12 million users and Fedora claims 24 million.
  • My company, LANDesk, continues to get an increased amount of request to support Linux flavors.

Experience 2 – A friend of a friend needing to compile an open source app on OS X
My favorite Operating System is FreeBSD, which has a great desktop version PC-BSD. While these are not exactly Linux, they are open source and actually more free than Linux (see my post on licenses). The rise in the use of FreeBSD and PC-BSD is also increasing rapidly.

Windows is the most used operating system by far. Did you know that the second most used operating system is FreeBSD-based. Yes, Macintosh users, underneath the hood of your pretty graphical user interface (GUI), you have a system that is derived in a large amount from FreeBSD.

Yes, if you are running OS X, you are running a system that is, underneath the hood, very similar to FreeBSD. It has a nice ports system called MacPorts that is a very similar system to FreeBSD’s ports system.

Well, as a replacement for a Visio diagram, I used the program Dia so that some of my friends could have the ability to modify and change the diagram (which happens about once a quarter) as desired without spending way too much for Visio when they otherwise would never ever use it. Well, a friend of a friend called me and wanted to use it.

Unfortunately at this time, Dia doesn’t have a version for OS X, but can be installed using MacPorts. So I found myself showing the average user how to install MacPorts. Unfortunately, I don’t have a Mac, so I couldn’t write a walk-thru of doing this and I don’t know if the friend of a friend was successful in installing Dia on OS X, but still, this average user wanted to do it and wanted this open source app that was available to him only because his system was derived in large part from FreeBSD.

Differences between the BSD/FreeBSD Copyrights and the GNU Public License (GPL)

The FreeBSD Copyright and the BSD Copyright

You may notice that FreeBSD uses the term Copyright while GNU uses the term License.
http://www.freebsd.org/copyright/copyright.html

The FreeBSD Copyright is free as in you don’t have to buy a license but you can do pretty much anything. The BSD Copyright is almost the same.

What you can do:

  1. Use it at home for no cost.
  2. Use it at work for no cost.
  3. Use it at work for a publicly accessible server that you make money on for no cost.
  4. Add or change code at no cost.
  5. Distribute the entire source code at no cost.
  6. Distribute the entire source code with your changes at no cost.
  7. Build binaries at no cost.
  8. Distribute binaries with your source at no cost if you also give it away at no cost.
  9. Distribute binaries without also distributing the original source and your changes.
  10. Write code that uses or links to this code and license your new code however you want.
  11. Embed the binaries in software you sell, at no cost, even if you don’t provide the source.

Note: This list was created by me based on my understanding of what people would want to do with the code.

Do I need a lawyer?
No. Basically, there is almost no instance in which you have to pay a fee to anybody to use a FreeBSD Copyrighted or BSD Copyrighted piece of code.

However, while 100% free in cost to use it, it is not 100% free. Notice I italicized the word almost in the above sentence.

For the FreeBSD Copyright, also known as the New BSD Copyright, there are two requirements you must meet.

1. Redistributions of source code must retain the above copyright notice, this list of conditions and the following disclaimer.
2. Redistributions in binary form must reproduce the above copyright notice, this list of conditions and the following disclaimer in the documentation and/or other materials provided with the distribution.

And for the BSD Copyright, there are four requirements listed, but as mentioned on the BSD Copyright web site, the third requirement is no longer required.

1. Redistributions of source code must retain the above copyright notice, this list of conditions and the following disclaimer.
2. Redistributions in binary form must reproduce the above copyright notice, this list of conditions and the following disclaimer in the documentation and/or other materials provided with the distribution.
3. All advertising materials mentioning features or use of this software must display the following acknowledgement:

This product includes software developed by the University of California, Berkeley and its contributors.

4. Neither the name of the University nor the names of its contributors may be used to endorse or promote products derived from this software without specific prior written permission.

So you can do anything you want with FreeBSD licenses and BSD licenses at no dollar cost, but you have to spend some time and resources to make sure you display some text as required.

I guess if you didn’t want to follow the 2 or 4 steps, you could find someone to pay so you didn’t have to, but the steps are so simple I doubt anyone would choose to try to license the software to not have to follow these steps.

The The GNU Public License or GPL

The The GNU Public License or GPL is not completely different but yet don’t be fooled. It is not the same and is far more restrictive than most realize. And it is harder to explain or describe, especially since there is GPLv1, GPLv2, GPLv3, and I am not even discussing the LGPL here.

You can get more info here:
A Quick Guide to GPLv3

What you can do:

  1. Use it at home for no cost.
  2. Use it at work for no cost.
  3. Use it at work for a publicly accessible server that you make money on for no cost.
  4. Add or change code at no cost.
  5. Distribute the entire source code at no cost.
  6. Distribute the entire source code with your changes at no cost.
  7. Build binaries at no cost.
  8. Distribute binaries with your source at no cost if you also give it away at no cost.

Do I need a lawyer?
For home use, no.
For a business, yes.

If you are doing anything NOT on the above list, you probably need to involve a lawyer. If you stick to the above list, then no, you probably don’t need a lawyer. However, the GPL is so long and wordy you may need a lawyer to determine if you need a lawyer.

The Difference between the BSD/FreeBSD Copyrights and the The GNU Public License or GPL

The first noticeable difference is that the FreeBSD Copyright is 25 lines (when wrapped at 78 characters with some lines blank due to section separation) while the GPL is 339 lines (when wrapped at 78 characters with some lines blank due to section separation). So it is much more difficult to learn and understand the GPL and there is a higher likelihood to take a wrong step.

The following items were removed these from the GPL’s can-do list because you can’t do them without permission from the author, which most likely will come at a cost but not always. Sometimes, the author will just say, “Yes, you can use it in your proprietary software” and sometimes they will charge a fee. However, even in those instances you probably need to pay a lawyer to draft and agreement and get it signed. However, one problem with GPL is that there are usually many different authors and so obtaining such permission becomes impossible.

  1. Distribute binaries without also distributing the original source and your changes.
  2. Write code that uses or links to this code and license your new code however you want.
  3. Embed the binaries in software you sell, at no cost, even if you don’t provide the source.

Lets put this in a table:

What you can do? BSD/FreeBSD Copyright GNU Public License or GPL
1. Use it at home for no cost. x x
2. Use it at work for no cost. x x
3. Use it at work for a publicly accessible server than you make money on for no cost. x x
4. Add or change code at no cost. x x
5. Distribute the entire source code at no cost. x x
6. Distribute the entire source code with your changes at no cost. x x
7. Build binaries at no cost. x x
8. Distribute binaries with your source at no cost if you also give it away at no cost. x x
9. (Commercial) Distribute binaries without also distributing the original source and your changes. x
10. (Commercial) Write code that uses or links to this code and license your new code however you want. x
11. (Commercial) Embed the binaries, without a license fee, in software you sell, even if you don’t provide the source. x

Conclusion

For use at home or work or school or play
In all practicallity there is no difference to a home user between the BSD/FreeBSD Copyrights and the GPL.

For Free Distribution
There is one slight difference in free distribution. Any code you write that uses GPL code must be GPL too. With the BSD/FreeBSD copyright, that is not the case. If you write software that uses or links to BSD licensed software, you can still choose your own license.

For Commercial and Enterprise Use
This is where the difference mainly resides between these two licenses.

For use internally for an enterprise or any use that doesn’t distribute the code, there is no difference.

However, when it comes to including the code or a binary in software that you sell, you are not free to do so. The BSD/FreeBSD Copyrights are much more business and enterprise friendly.

DISCLAIMER

I am not a lawyer. I am not responsible in any way for the misuse of a license based on this post, even if the post is has some piece of data that is blatantly wrong. It is the responsibility of the user of licensed or copyrighted software to make sure the license agreement or copyright is adhered to properly.

How to install VMWare-tools on FreeBSD 8 or PC-BSD 8?

I have documentation on how to create a FreeBSD 8 Desktop environment here:
How to install and configure a FreeBSD 8 Desktop with Xorg and KDE?

However, if you install FreeBSD or PC-BSD as a VMWare guest, you will want to install two additional pieces of software when you are finished:

  1. You need to install the VMWare X11 driver (no, it will not be installed when you install the VMWare tools)
  2. You need to install VMWare-tools

This guide is to walk you through resolving the second of these two issues. I assume you followed my article for building the FreeBSD desktop, and if you did, these steps will work for you. But if you didn’t, I can’t guarantee that there won’t be some steps that are slightly different for you.

In order for me to consider the VMWare-Tools installed and working, the following features must work:

  • Clipboard Synchonization
  • Grab/Release Mouse Input when mouse enters/leaves the guests screen
  • Autofit Guest (automatically making the guests screen resolution take all available space)
  • Time Synchronization (the time in the VMWare guest will match the hosts time).

In this document, I successfully get these features working.

I have VMWare Workstation 6.5.3 build 185404 and the host is Windows 7.

Part 1 – Installing and Configuring the VMWare X11 Driver

Already posted on this here:
How to install the vmware video card driver on a FreeBSD 8 guest virtual machine?

Part 2 – Installing and Configuring VMWare Tools

Step 1 – Mount the VMware Tools virtual cd

  1. On the VMWare hosts make sure that your FreeBSD guest is selected and that you are not full screen so you have the VMWare Workstation application surrounding the FreeBSD guest.
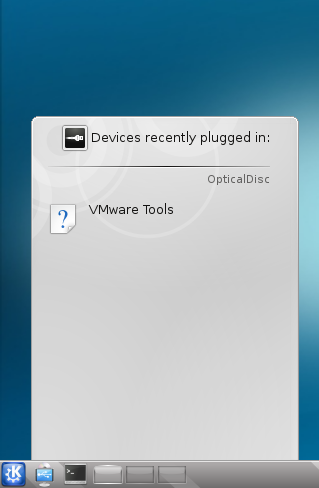
  2. From the VMWare Workstation application, choose VM | Install VMWare tools…You will see a pop-up inside FreeBSD on the bottom left.
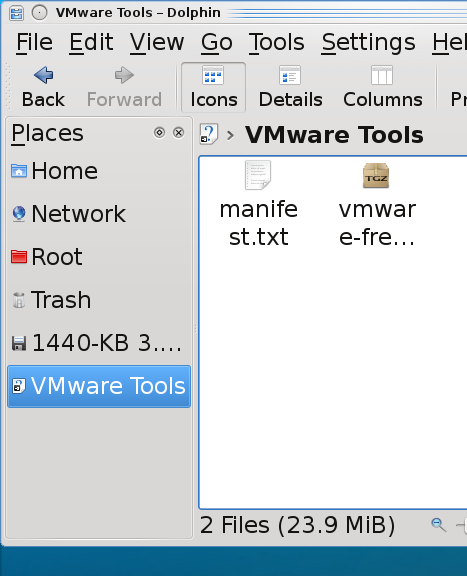
  3. Click on the popup where it says VMWare Tools. This will open Dolphin file browser.
  4. In the Dolphin file browser on the bottom left, you should see the VMWare Tools media. Click on it.

Step 2 – Extract the vmware-freebsd-tools.tar.gz

  1. Right click on vmware-freebsd-tools.tar.gz and choose Extract Archive to… Now you can extract to where you want, as long as you have the folder permission to write to, but the next steps describe where I extracted it to.
  2. Click on Home at the left. There is no need to create a folder as the extacted files will all be in one folder called vmwware-tools-distrib when extracted.
  3. Click OK. The vmware-freebsd-tools.tar.gz is extracted.

Step 3 – Open a shell as root

  1. Cick K | Applications | System | Konsole to open the shell.
  2. Type in su$ su
    Password:
    #

Step 4 – Install the freebsd6 compatibility package.

  1. Determine your architecture or processor type. If you are 64 bit, it will be amd64 even it is intel 64 bit. If you are 32 bit, it is likely x86. Type uname -a to determine what your architecture is and look at the last piece of information provided.

    # uname -a
    FreeBSD FBSD8.hsd1.ut.comcast.net. 8.0-RELEASE-p2 FreeBSD 8.0-RELEASE-p2 #0: Tue Jan 5 21:11:58 UTC 2010 root@amd64-builder.daemonology.net:/usr/obj/usr/src/sys/GENERIC amd64
    #

  2. Install the compat6x-[arch].tgz package, where you replace [arch] with your architecture.  This is already installed on PC-BSD.
    # pkg_add -r compat6x-amd64

Step 5 – Compile and Install the vmware-freebsd-tools

  1. Change to the directory where you extracted the vmware-freebsd-tools.tar.gz.

    # cd /home/jared/vmware-tools-distrib

  2. Run vmware-install.pl.# ./vmware-install.pl

    Just keep hitting enter and accepting the defaults until the vmware-tools are installed.

Step 6 – Start vmware tools

  1. As root run the following:

    # /usr/local/etc/rc.d/vmware-tools.sh start

    Or you could just reboot.

    Note: Since vmware-tools doesn’t exactly integrate with rcNG, you don’t need to add anything to /etc/rc.conf. The just dump a script into /usr/local/etc/rc.d and it is just a shell script and isn’t formatted to require it to be enabled by /etc/rc.conf.

Step 7 – Enabling VMWare user features
The vmware-user process must be launched to enable vmware-user features.

  • Clipboard Synchonization
  • Grab/Release Mouse Input when mouse enters/leaves the guests screen
  • Autofit Guest (automatically making the guests screen resolution take all available space)
  1. Configure vmware-user to run at KDE login by copying the /usr/local/bin/vmware-user shell script to the ~/.kde4/Autostart directory.  You could also create a symlink.
    $ cp /usr/local/bin/vmware-user ~/.kde4/Autostart

    Note: You don’t have to use the command.  In the System Settings under Advanced |Autostart there is an option to Add Script that you can use.

  2. Logout of KDE and log back in.

Step 8 – Running the VMWare-Toolbox
There may be some vmware settings you want to change on the VMWare guest. Not many are configurable through the vmware-toolbox on FreeBSD but at least one is configurable here called Time Synchronization. This feature will synchronize your vmware guest’s time with the hosts time.

  1. Run vmware-toolbox

    $ vmware-toolbox

  2. Check the box to enable time synchronization
  3. Feel free to explore and become familiar with the other settings, there aren’t many and two of the settings can only run as root.

Tuning Recommendations
I found a lot of tuning recommendations. However, if you chose Other | FreeBSD or Other FreeBSD 64 when creating your vm, these first two are set by default.

  1. It is recommended to have kern.hz set to 100 and it is by default so nothing to do here.
  2. It was recommended that on the host, in the vmx config file for the guest, that the following be configured:
    • ethernet0.virtualDev = “e1000”

    Again, if you chose Other | FreeBSD or Other FreeBSD 64 when creating your vm, this is set by default.

  3. Some people will recommend this setting in the vmx config file as well:
    • tools.syncTime = “TRUE”

    However, this is the same as the time synchronization setting we configured with the vmware-toolbox. It is safer to make the configuration in the vmware-toolbox tool.

If you know of any further tuning options, please comment them to me.


Copyright ® Rhyous.com – Linking to this article is allowed without permission and as many as ten lines of this article can be used along with this link. Any other use of this article is allowed only by permission of Rhyous.com.